Lambretta Club of Australia
  • Welcome
  • Membership
    • Benefits
  • Club Info
    • Pacemaker
    • Committee Members
    • Tool Libraries
  • Club Rego
  • Australian History
  • Shopping
    • On Demand Merchandise
    • Jamboree Photos
    • Superdealers
    • Asian Restorations
  • Events
    • Upcoming Events >
      • LCoA Jamboree 8 - Canungra QLD >
        • Attendee Info
        • Schedule of Events
        • Caravan Options
        • FAQs
      • WA Payment Page
  • Links
    • International Lambretta Clubs
  • Contact

Indian GP Engine Build Part 9

25/2/2020

0 Comments

 
I get frustration...

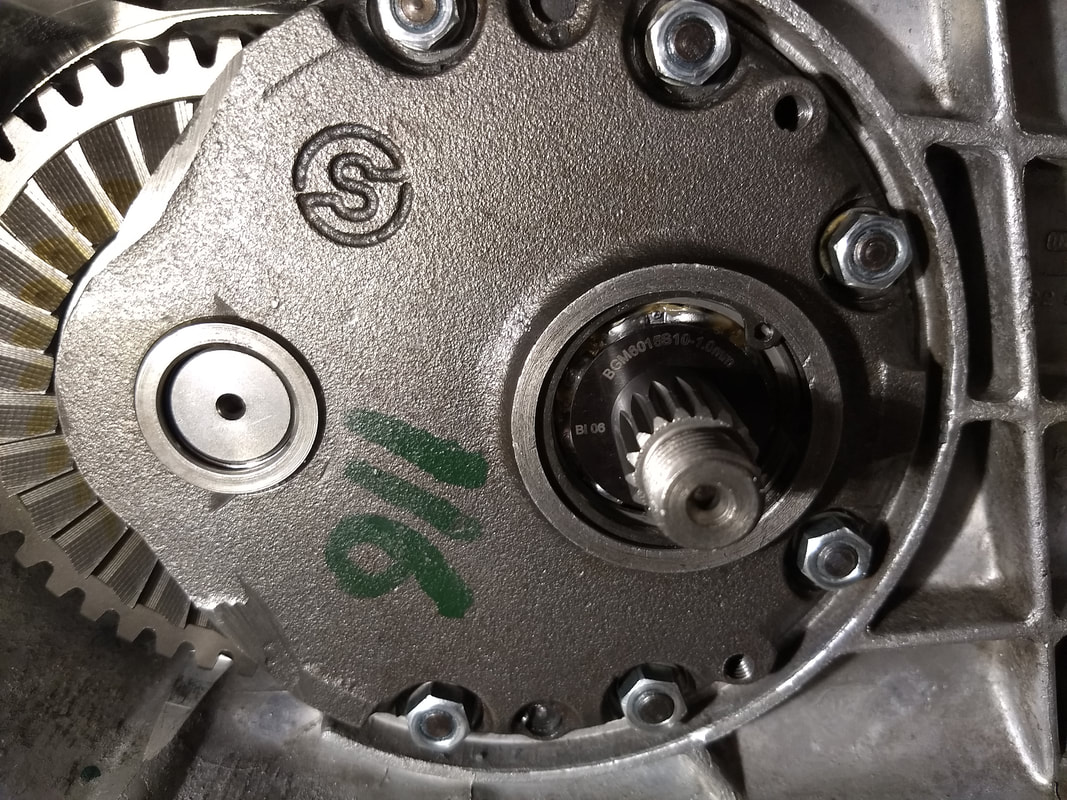
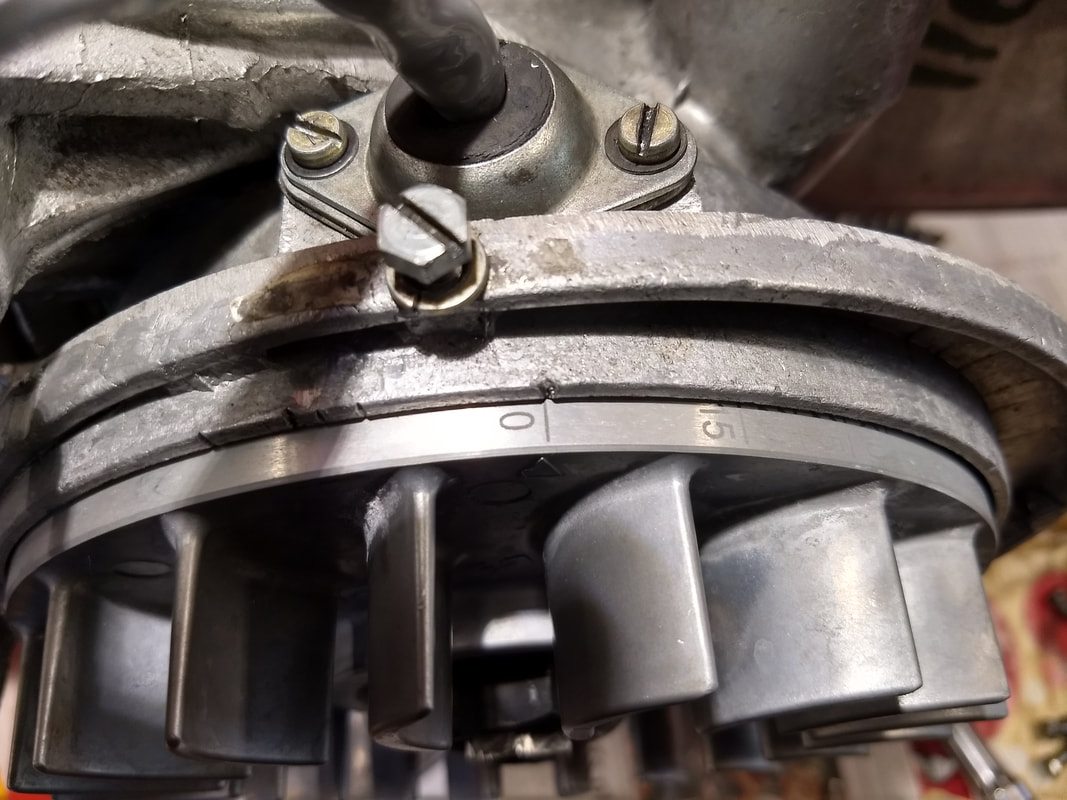
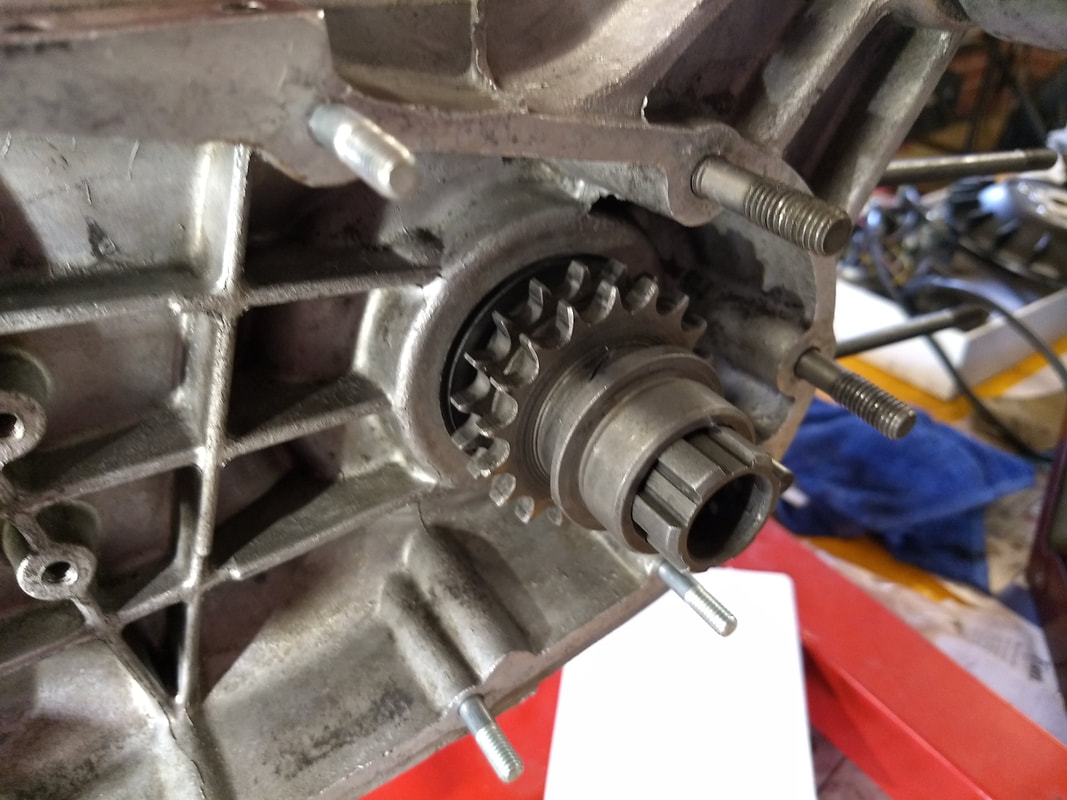
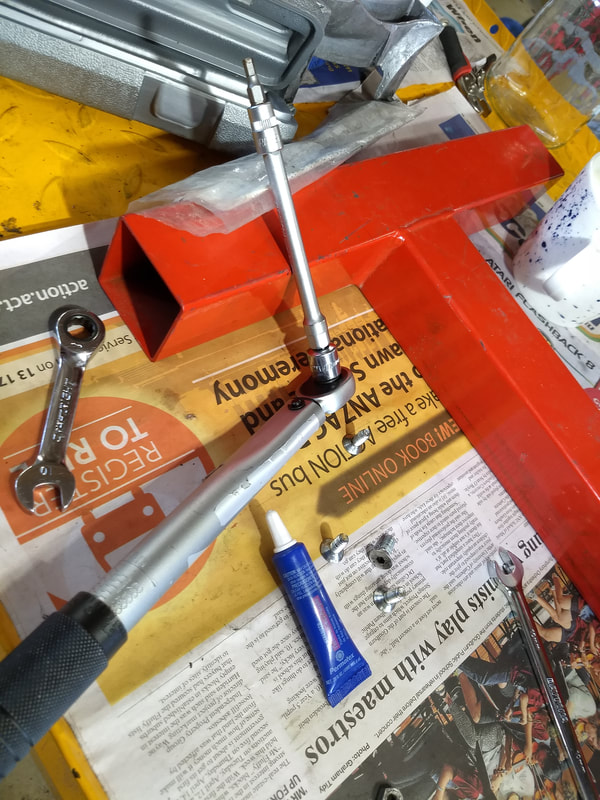
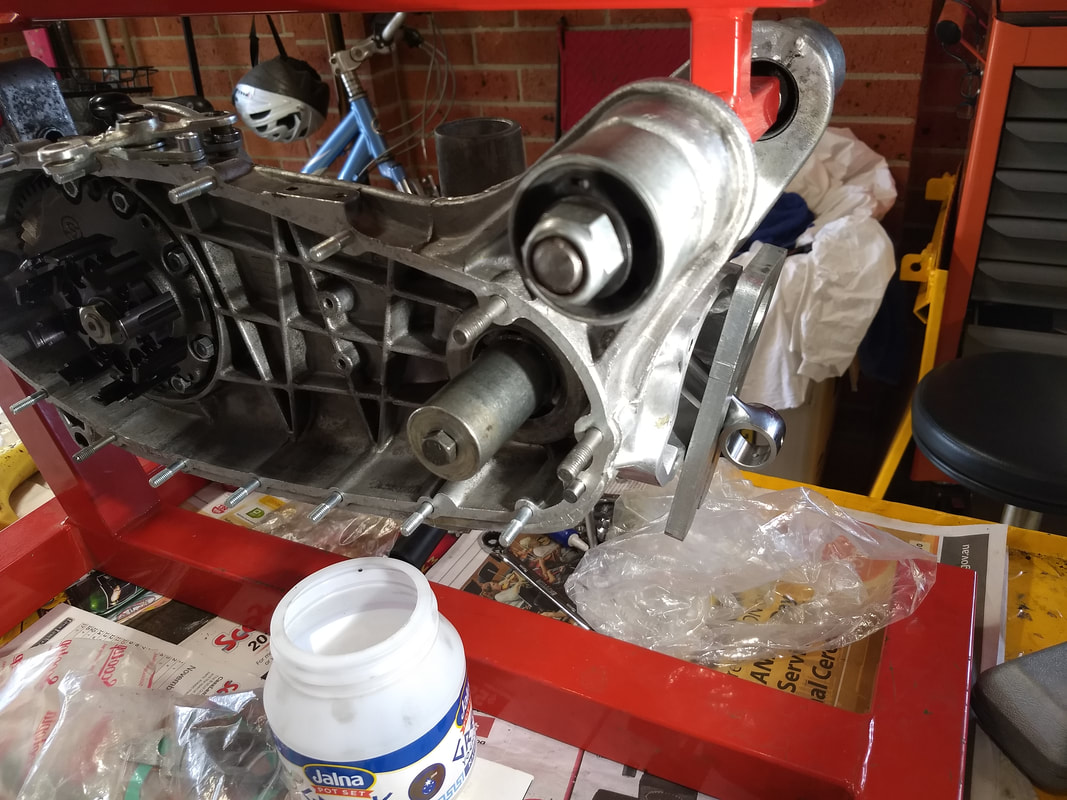
Today's build is a case of doing what I can to progress things whilst waiting for bits. The plan is to see what else I'm missing and get a single order to Steve Diffey… First up fit the clutch sprocket and spider. I intend to set the chain alignment properly, as per the advanced engine build section in Sticky's manual, and hence have purchased a complete set of BGM clutch sprocket shims. But there's no point trying to do this until I can tighten down the front sprocket, so I use any old one for now and will measure and change later...
Picture
Picture
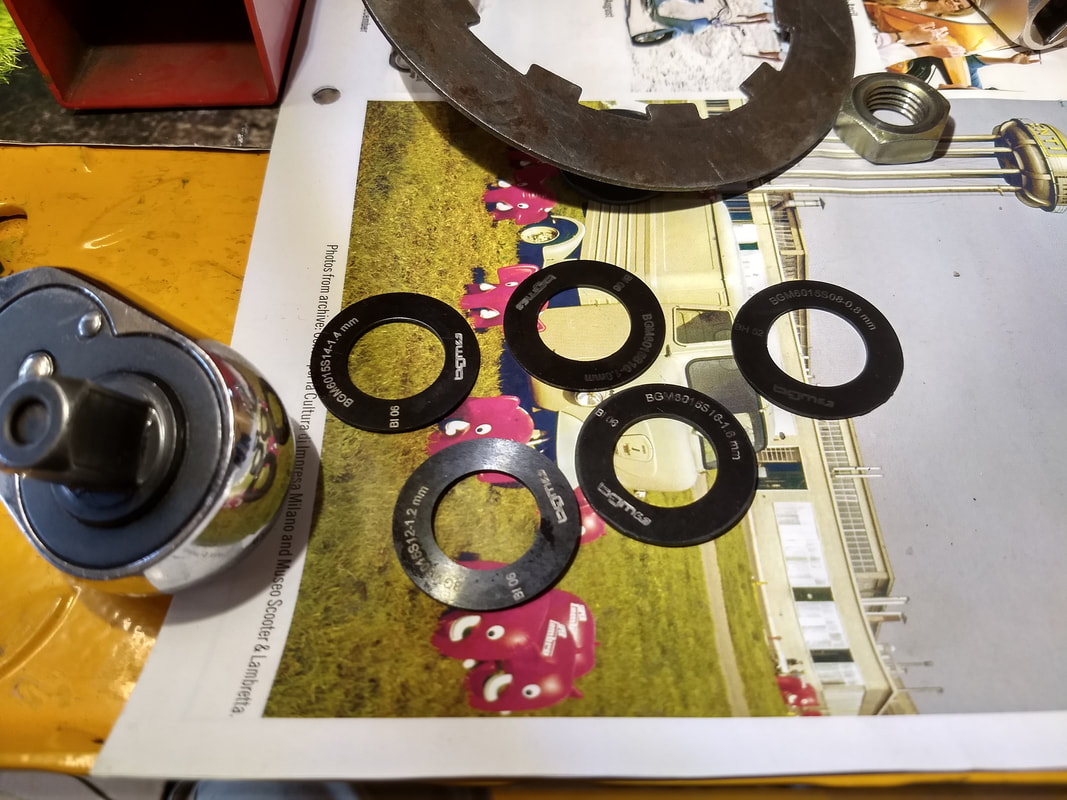
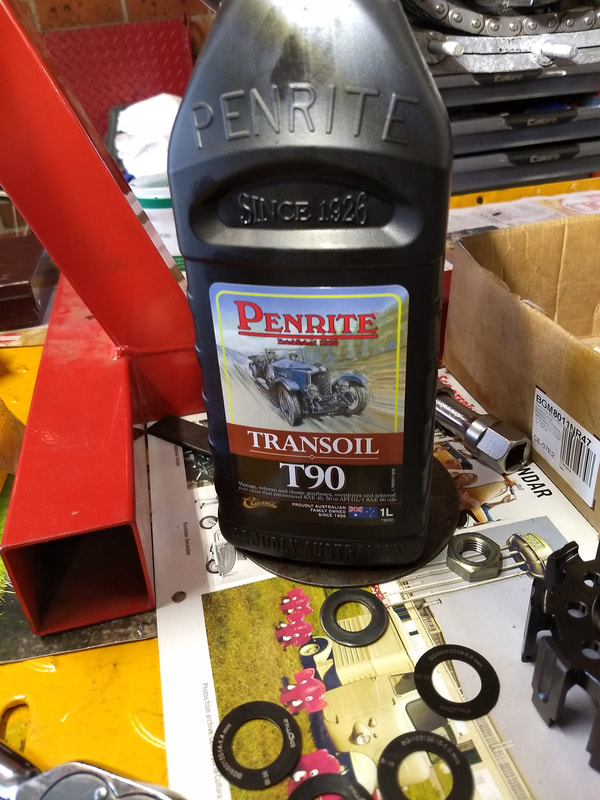
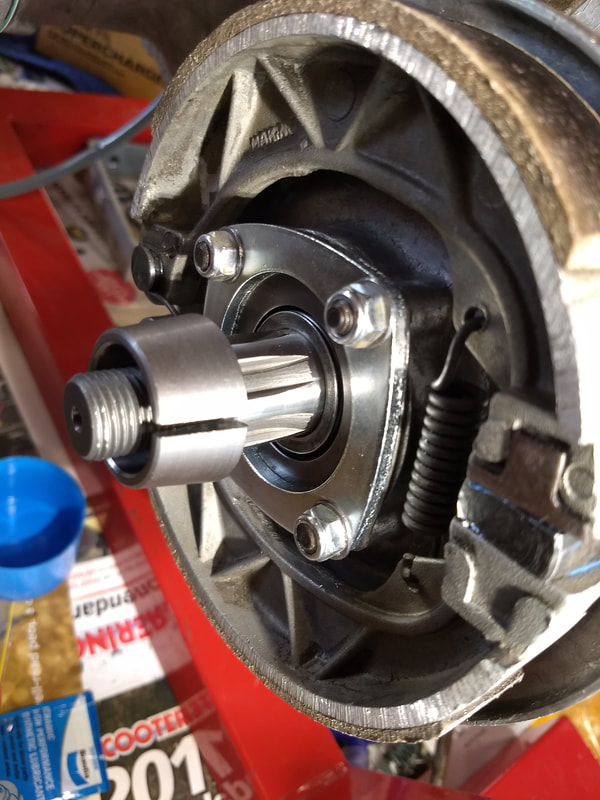
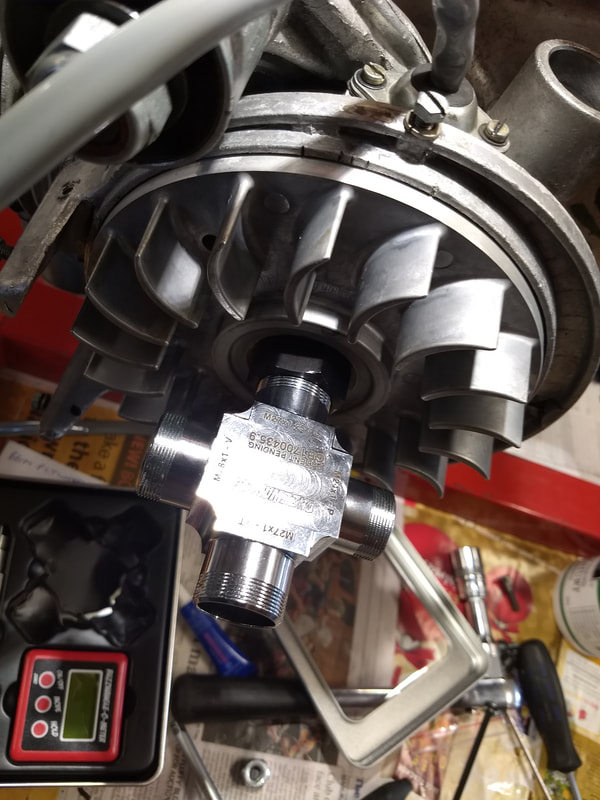
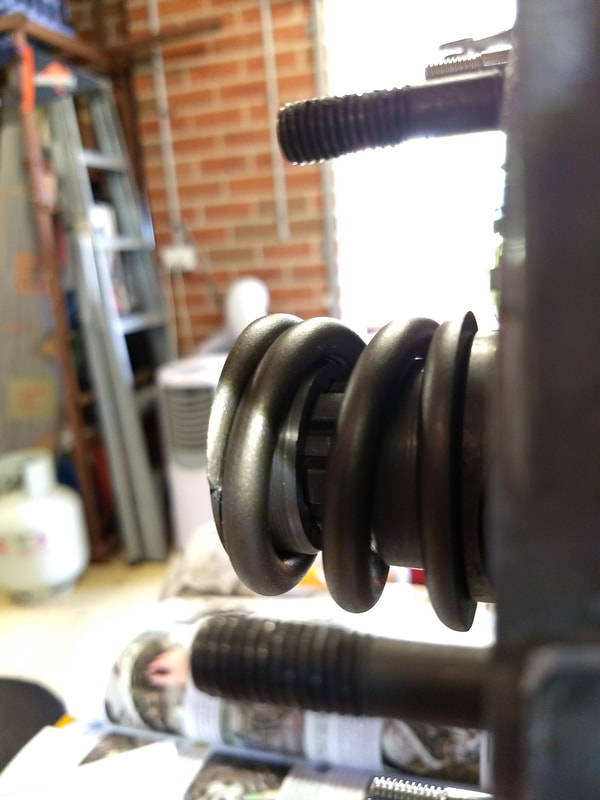
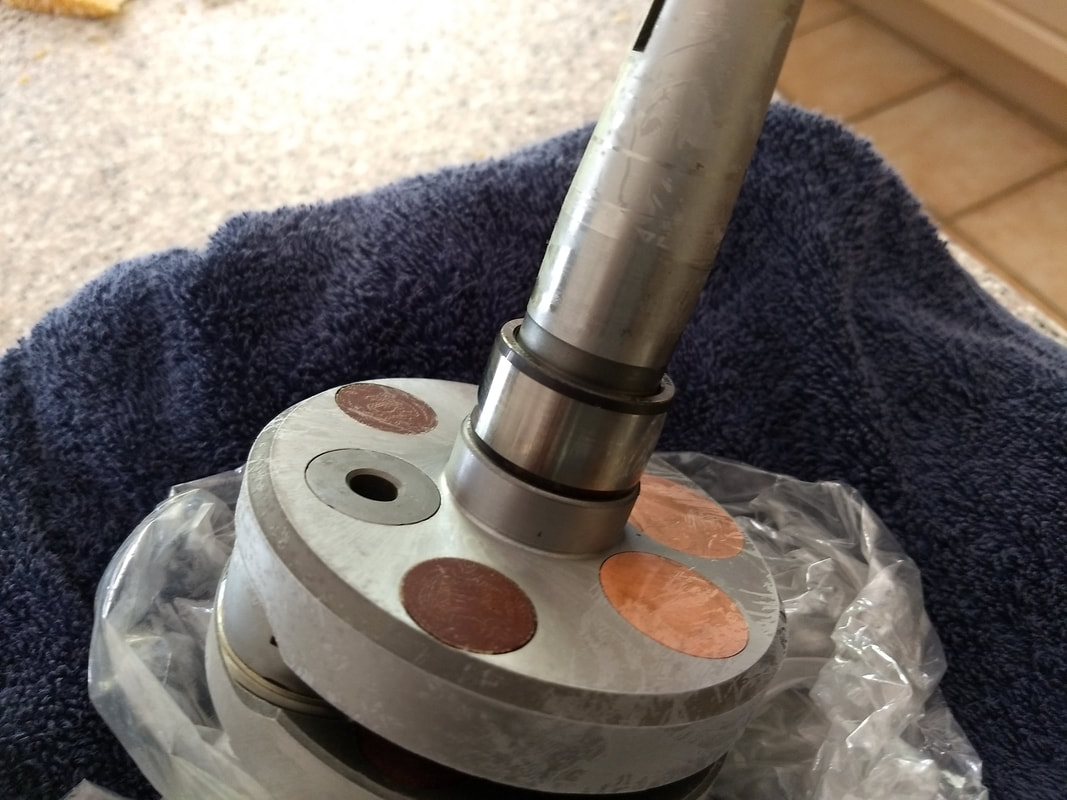
I'm fitting a BGM Superstrong clutch, again something that I've had for a while. I'd originally intended to fit it to the Jet, but having replaced the Mugello with the original cast iron barrel this seemed overkill. The barrel was given an old school stage 3 tune by Ian at Taffspeed back in 1992, but nothing stronger than an original clutch with standard springs is required when running with a 22mm Jetex and BGM big-bore exhaust. The BGM clutch is a lovely piece of engineering though, so should be perfect for a TS1. The bronze bush between the sprocket and spider gets a good coating of gearbox oil. Which oil to use seems to be a common question on Facebook, etc. I use Penrite T90, as pictured, although I am now wondering if that's still the correct one to use with the BGM plates? Hmm, better check before filling her up! The chain is a new Scootopia one, which I believe they use for their endurance racers.
Picture
Picture
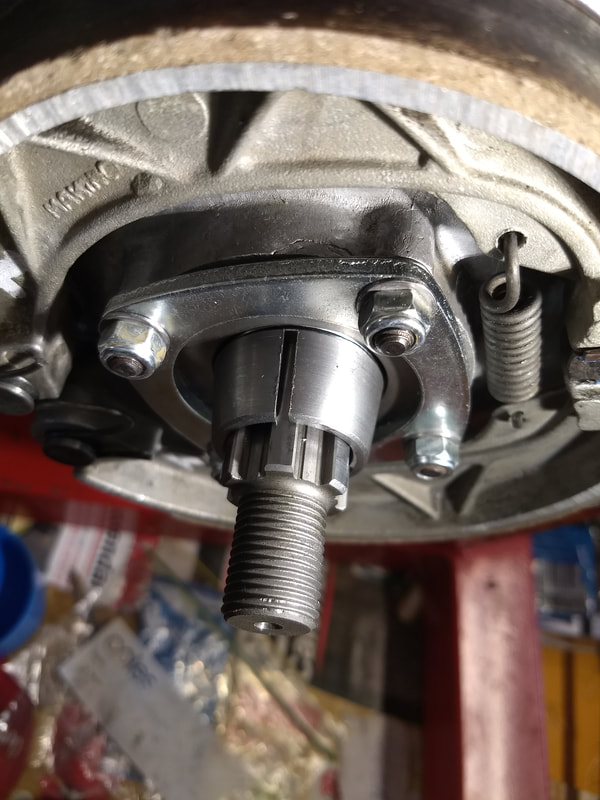
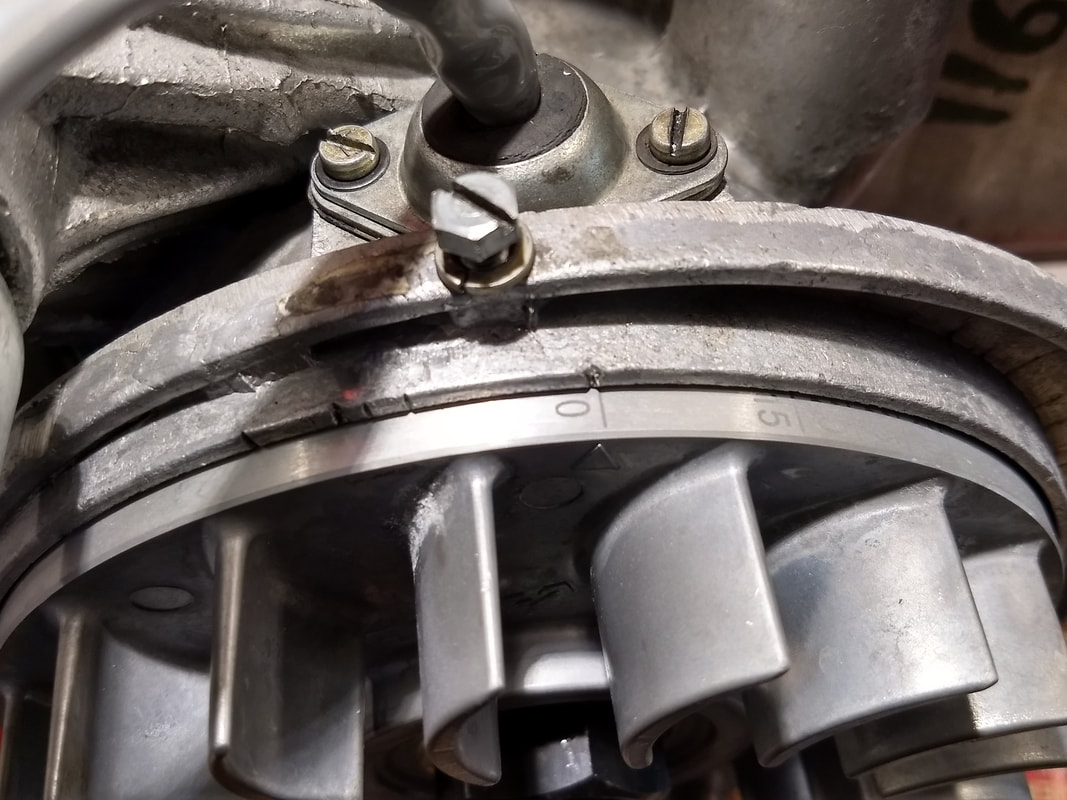
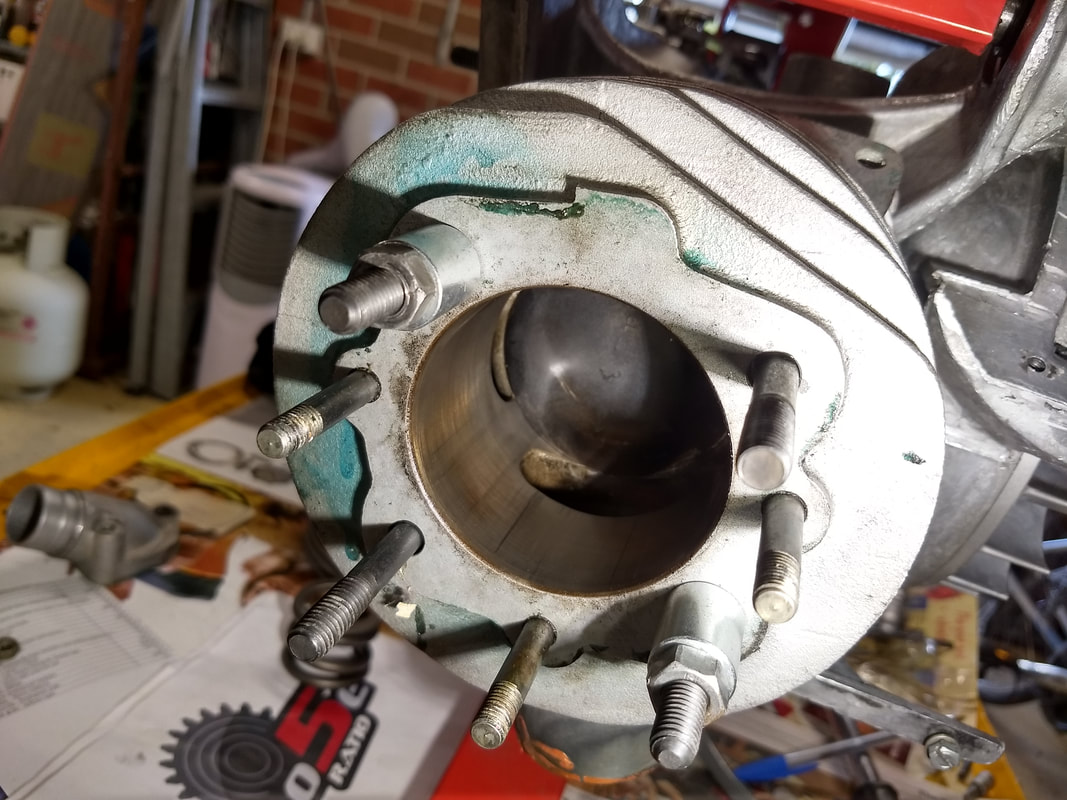
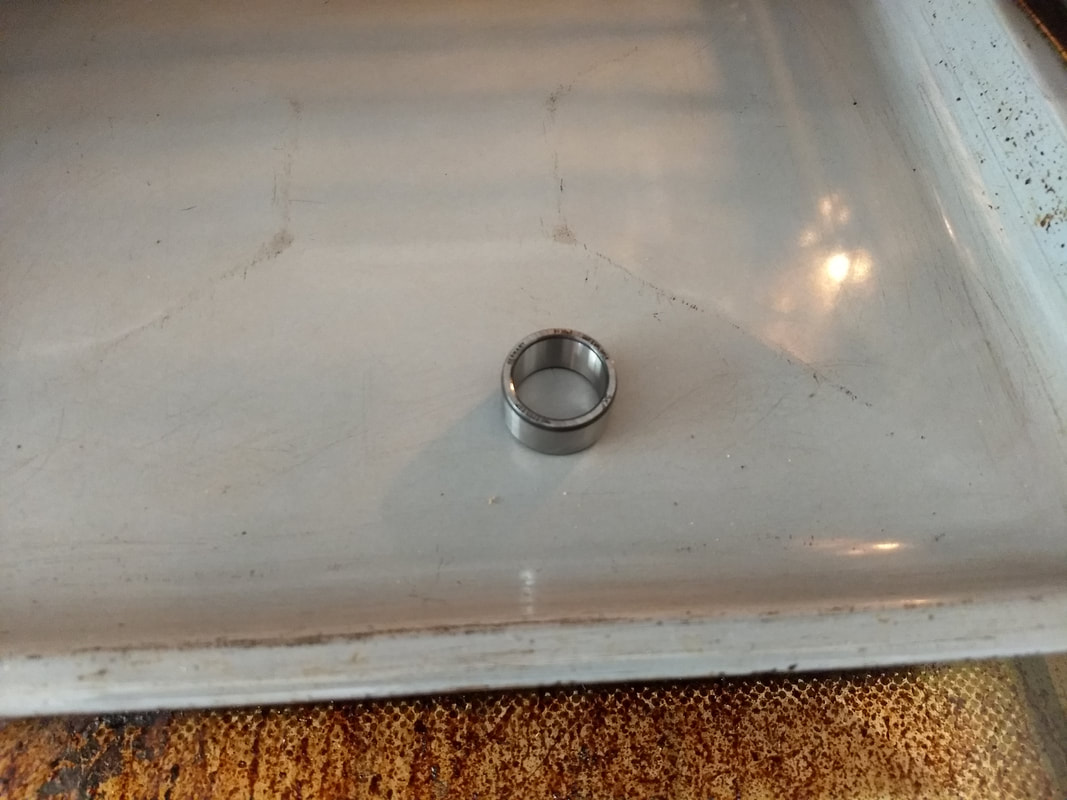
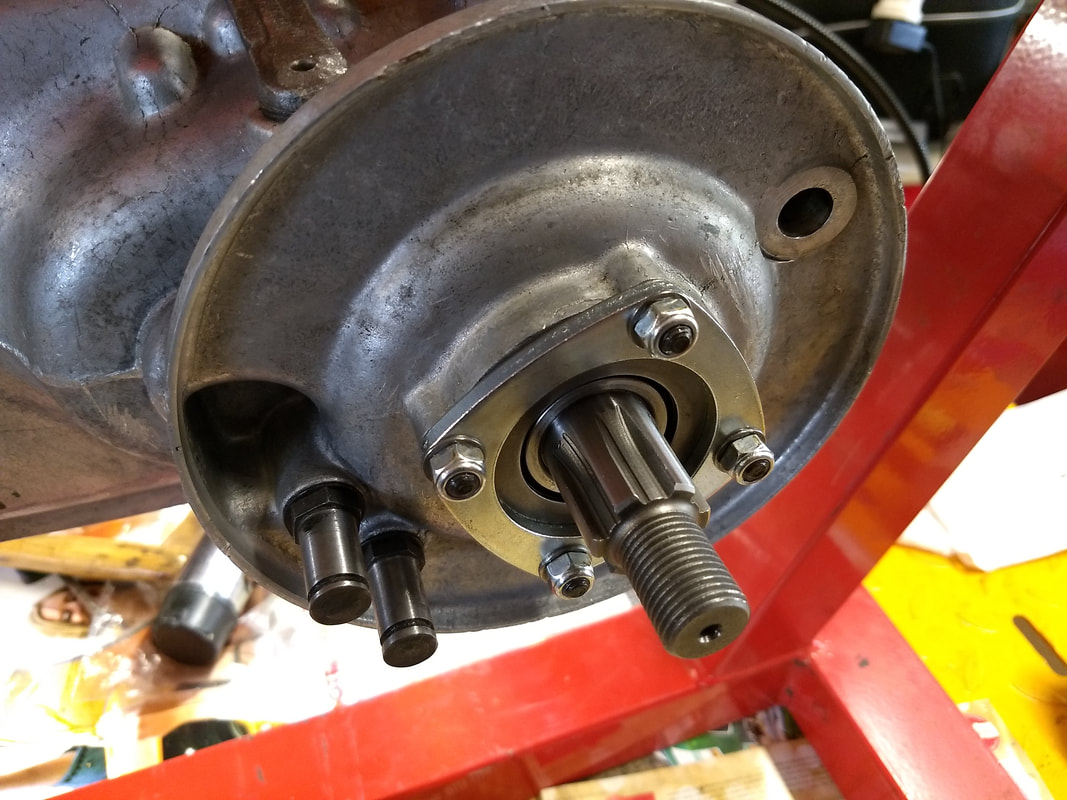
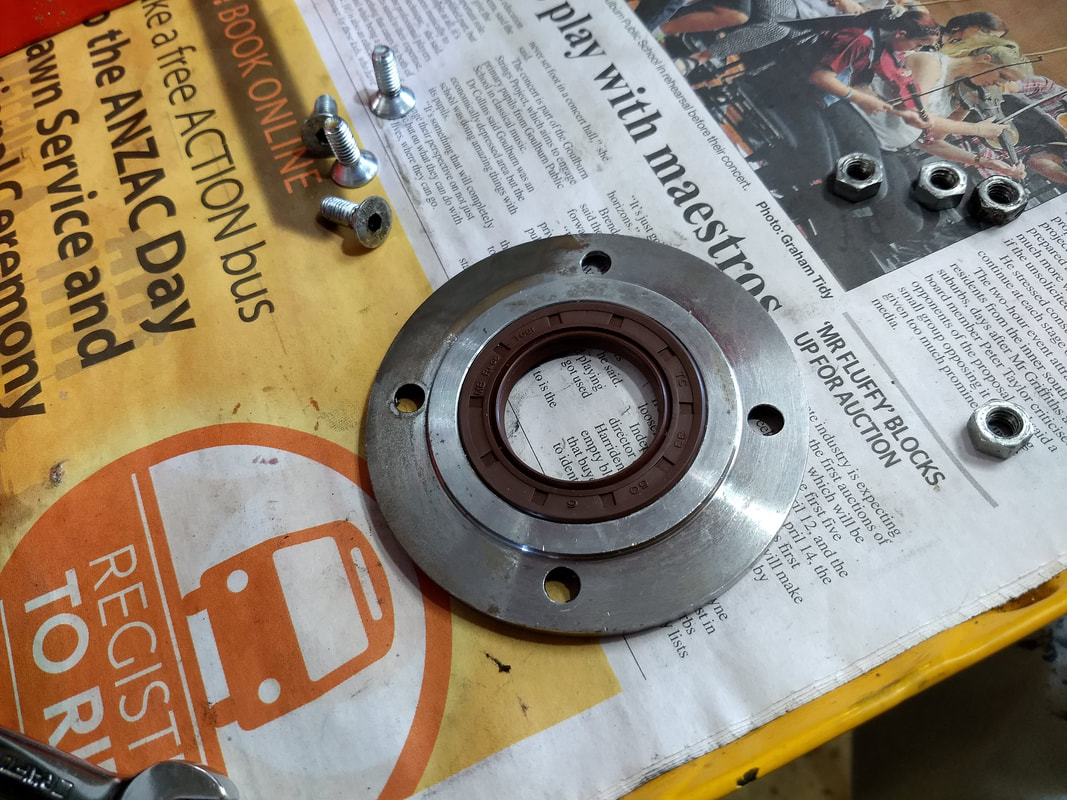
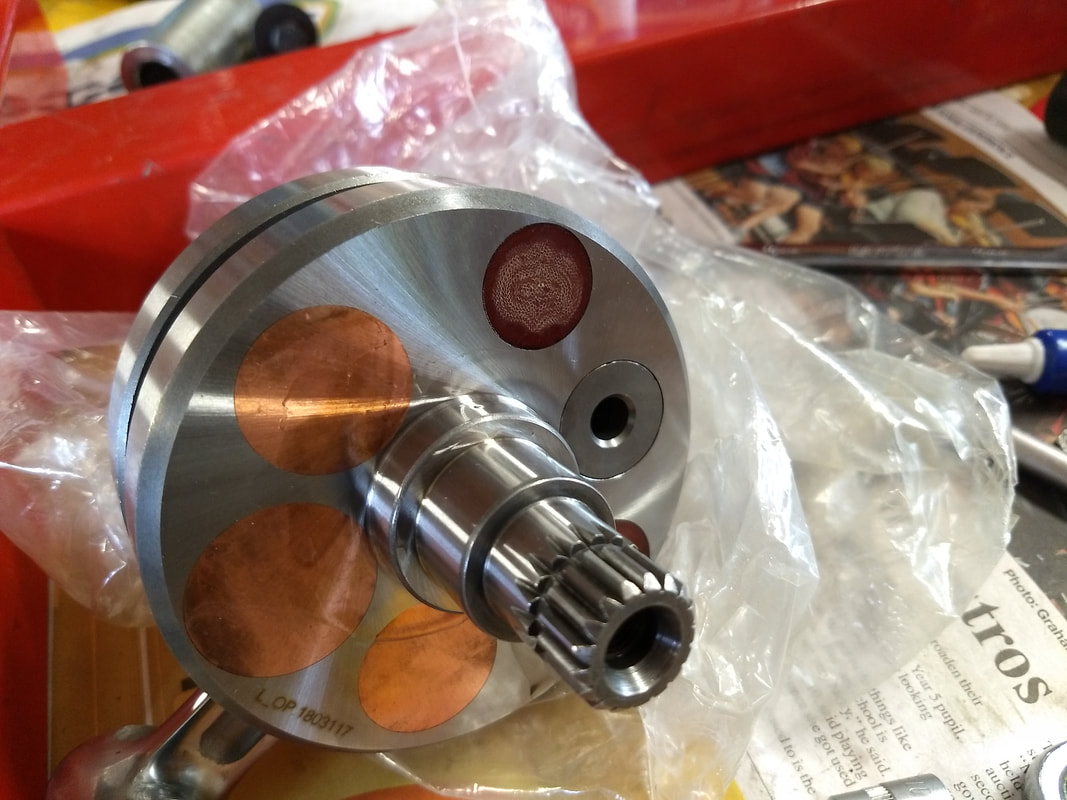
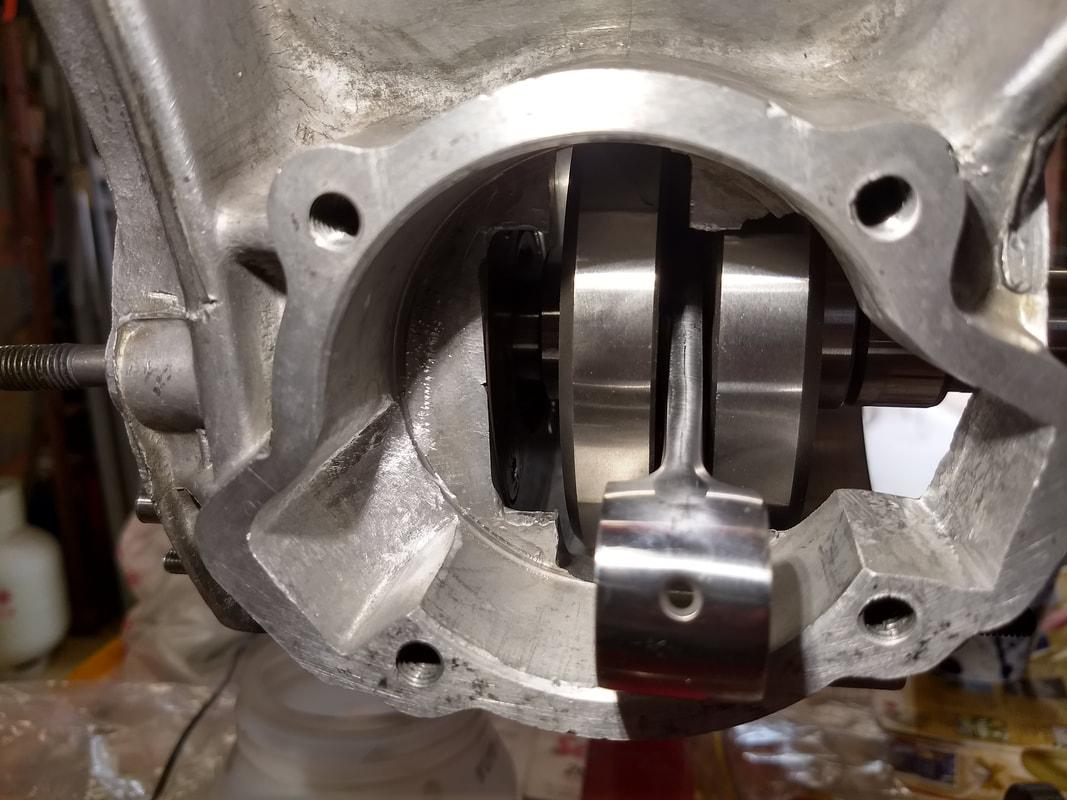
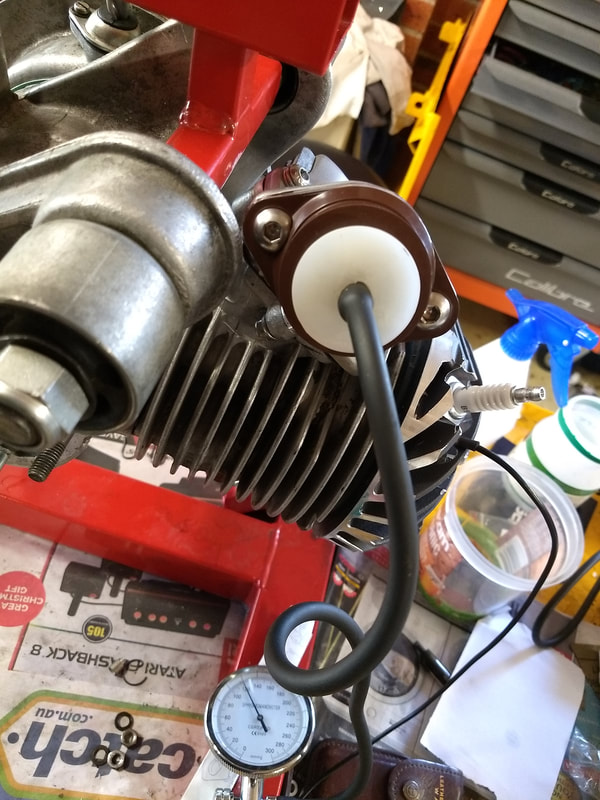
I fit the spider and hand tighten the nut, but can't go any further on this side until my new sprocket spring cap arrives...Time to fit the rear hub. I clean the brake cam and fit a new "fatter" O ring. As far as I can tell the Indian built engine never had an O ring fitted. Fitting a fatter one is a tip from Sticky's manual and should seal better.
Picture
Picture
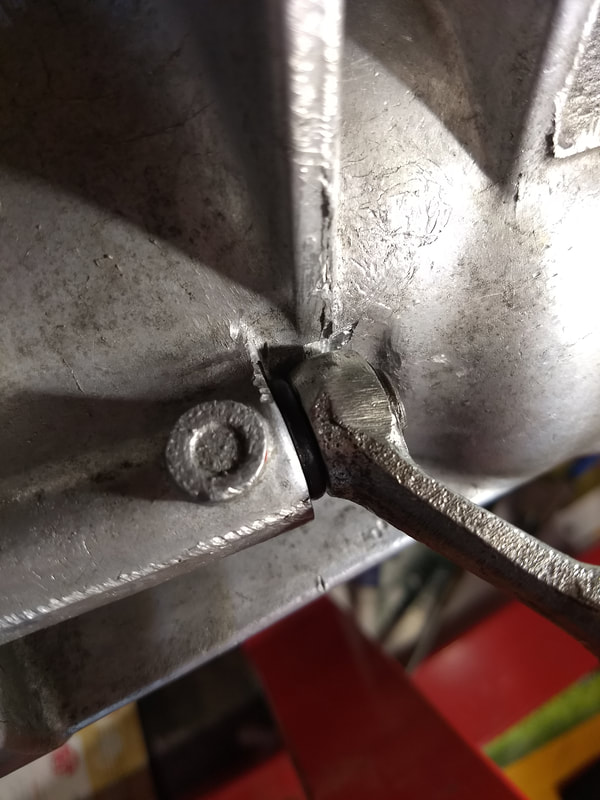
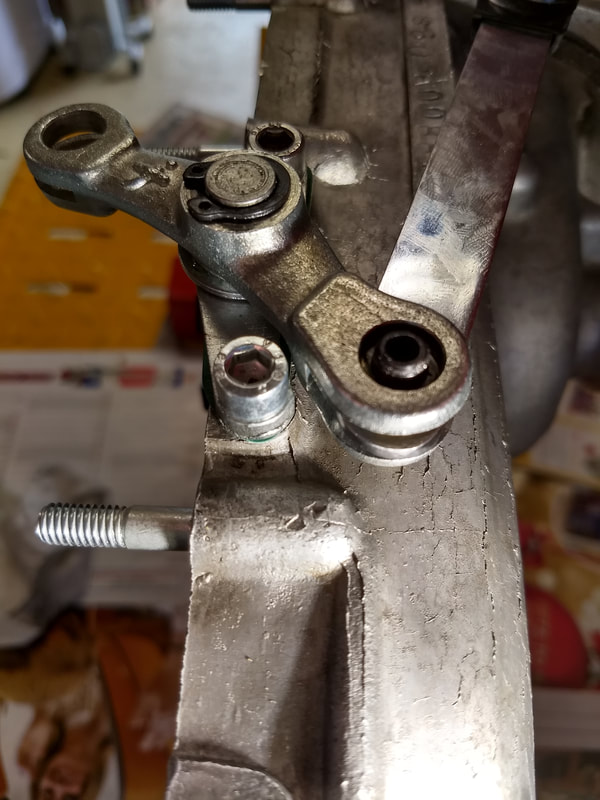
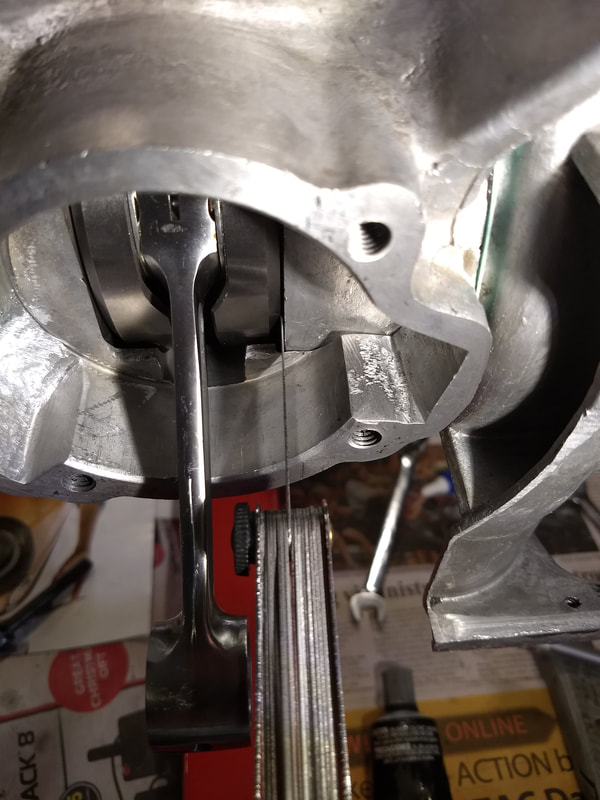
Sticky says to use copper grease on the pivot pins and cam, but I only have Bendix high performance synthetic lubricate, so use that instead (oh, err...). I've cleaned up the old shoes and they're usable, but seeing as I'm fitting a new hub I'll order new shoes as well.
Picture
Picture
Picture
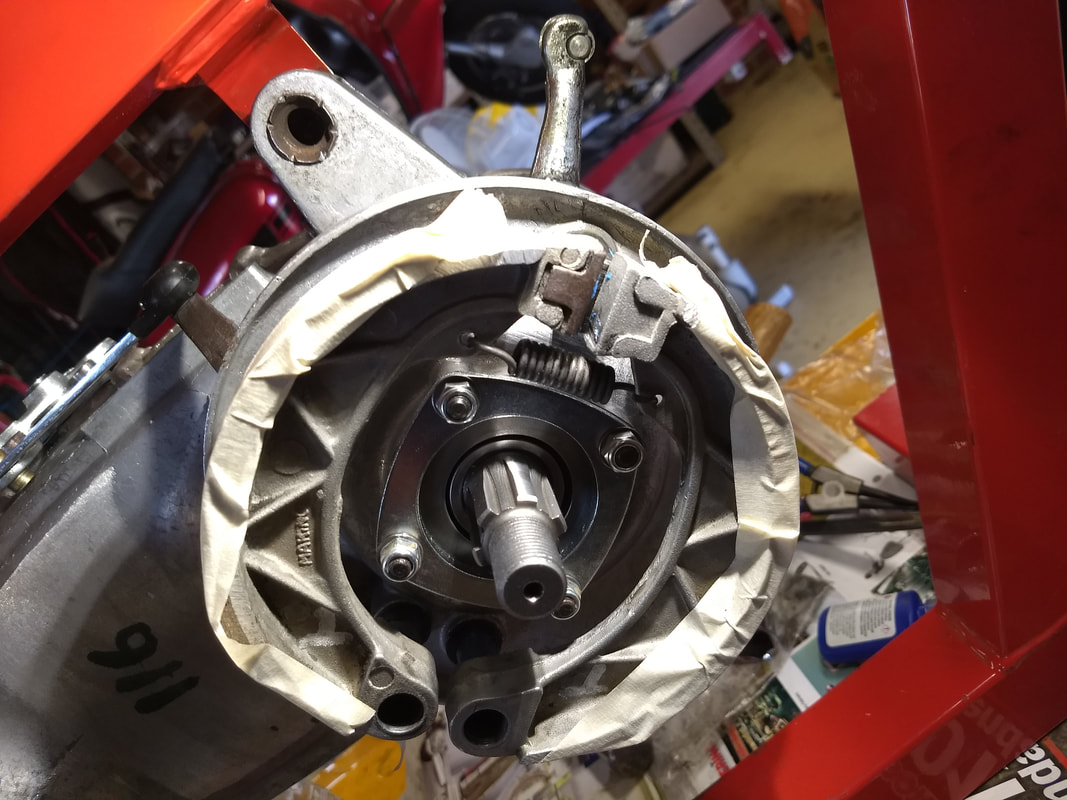
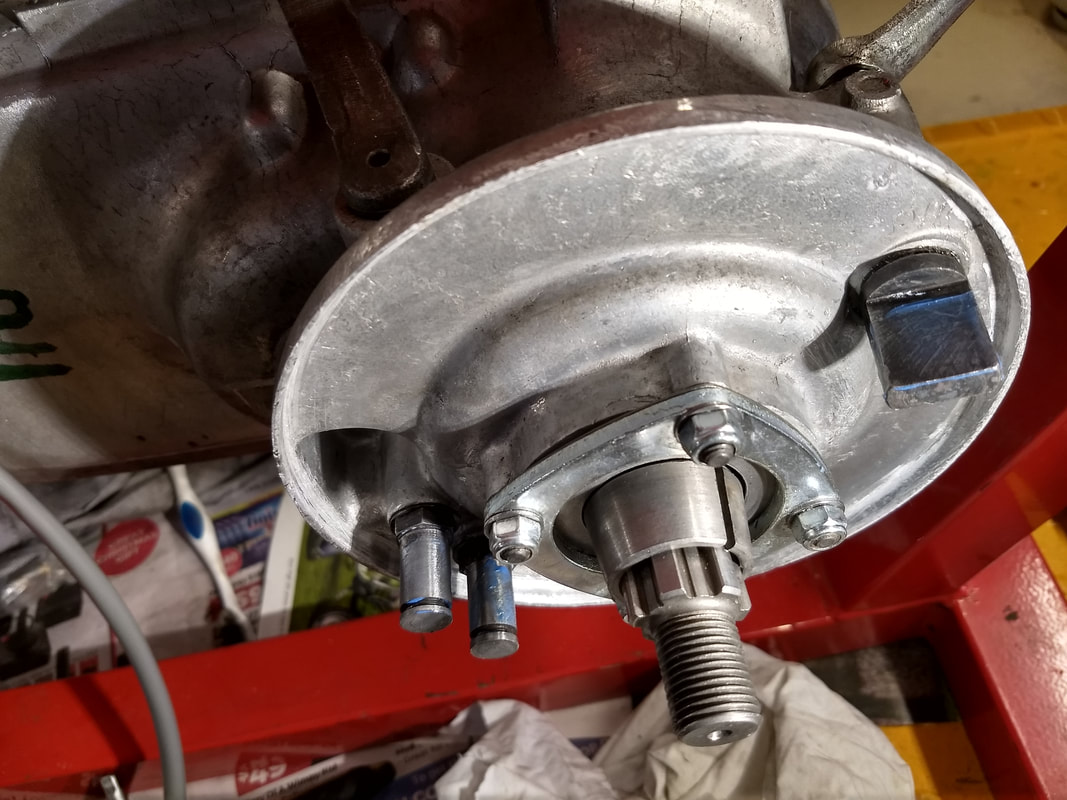
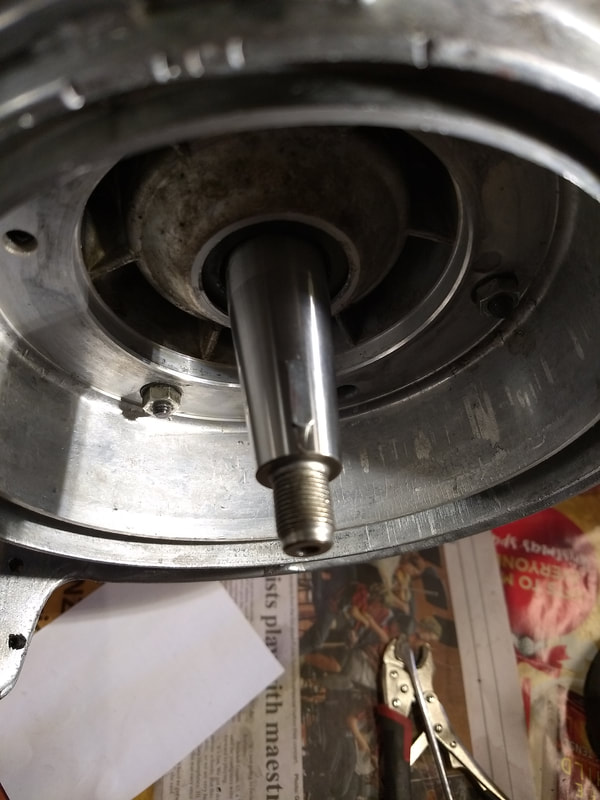
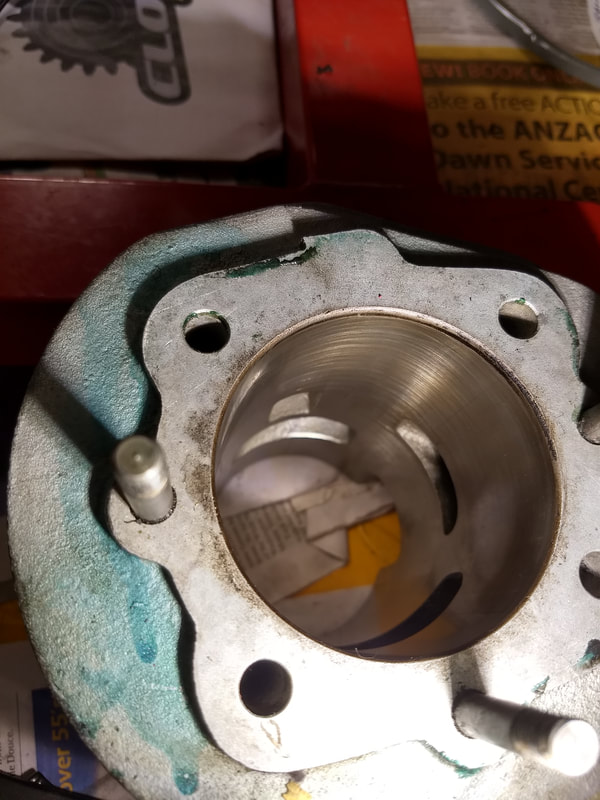
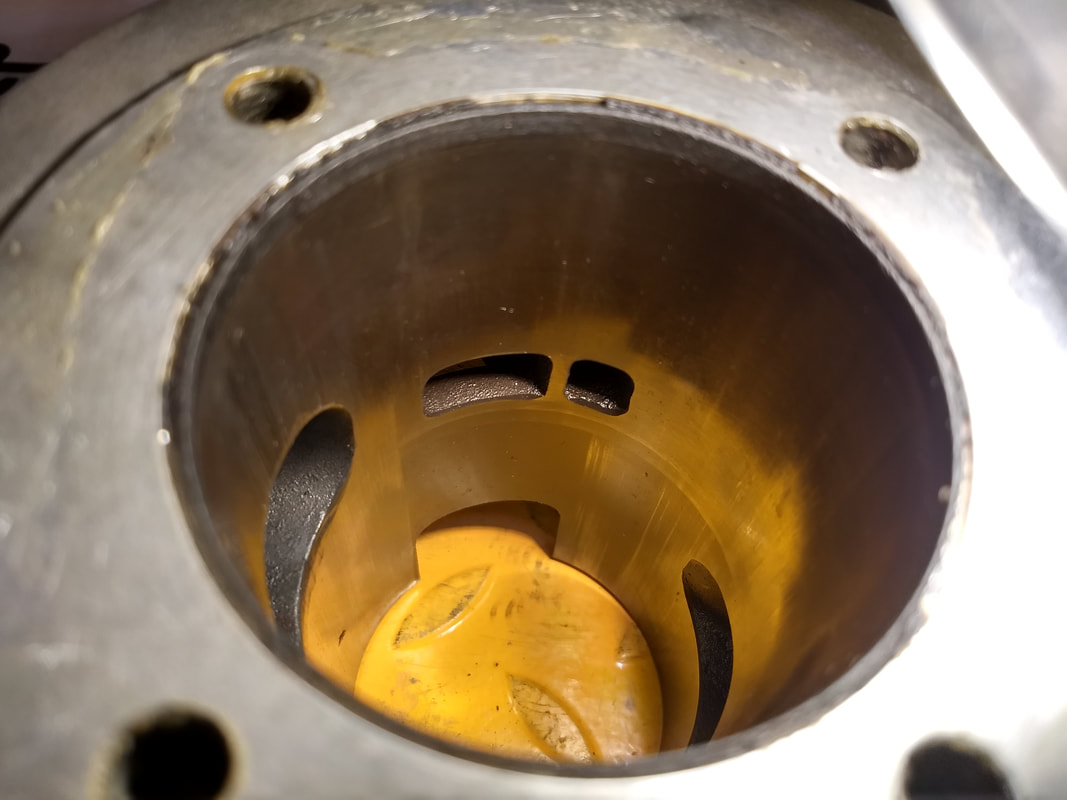
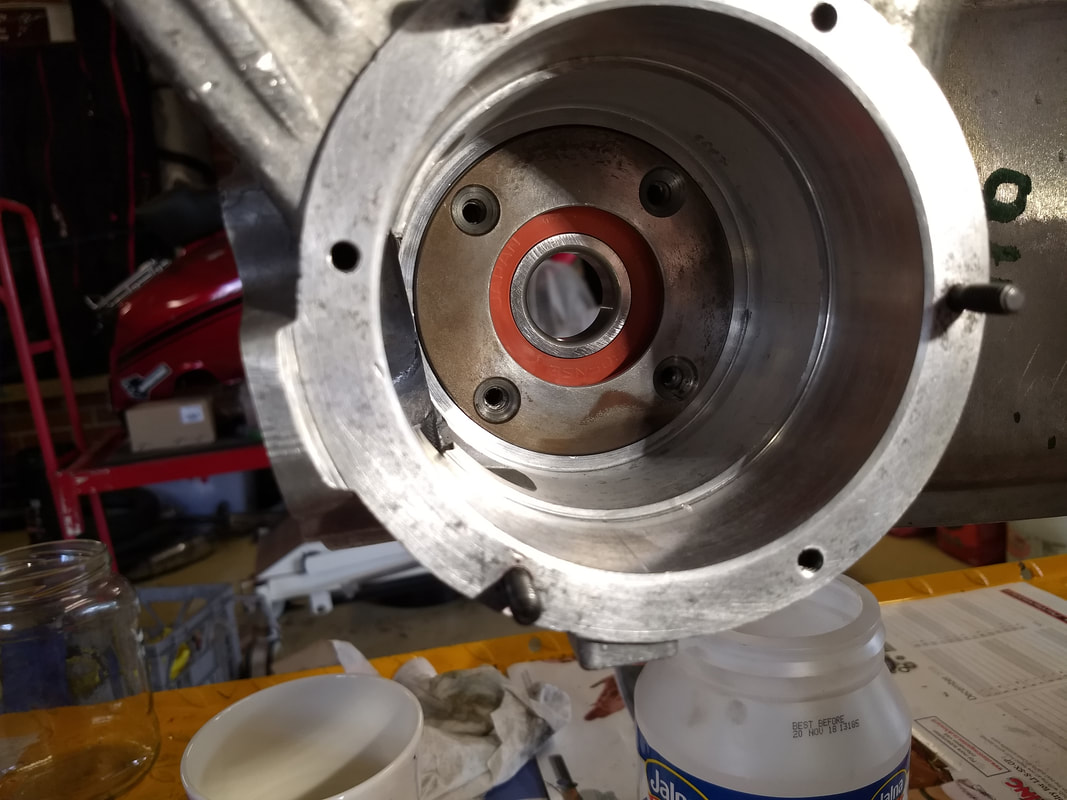
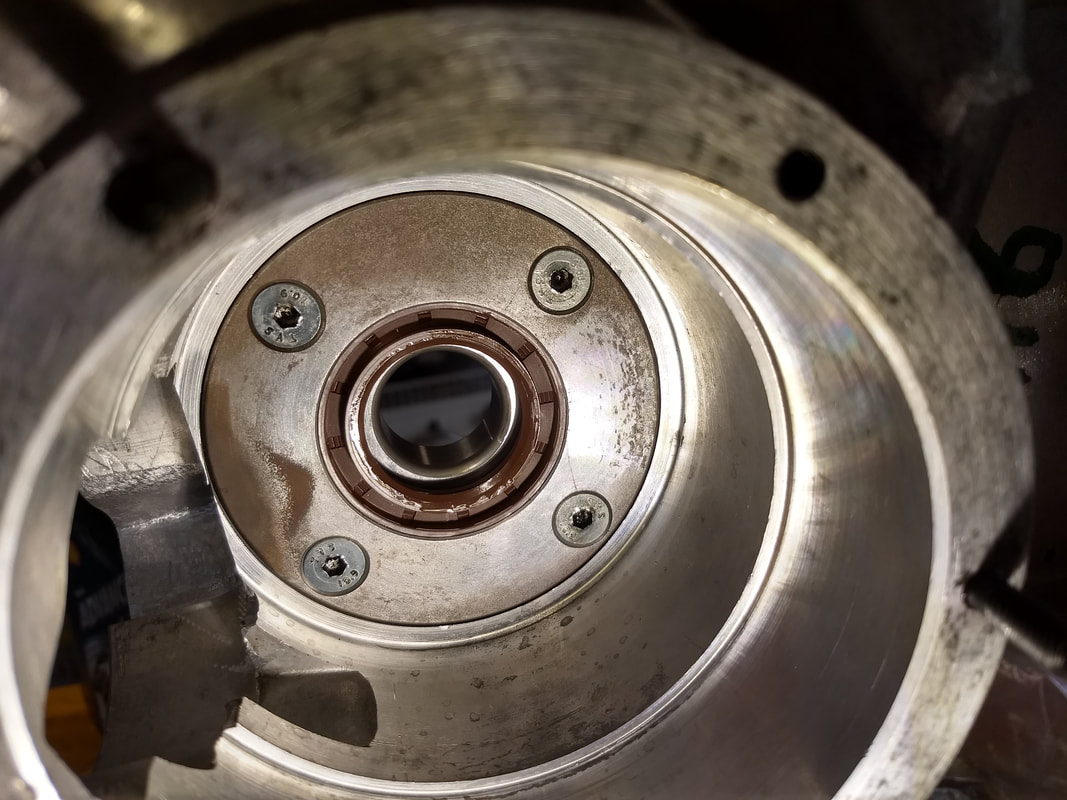
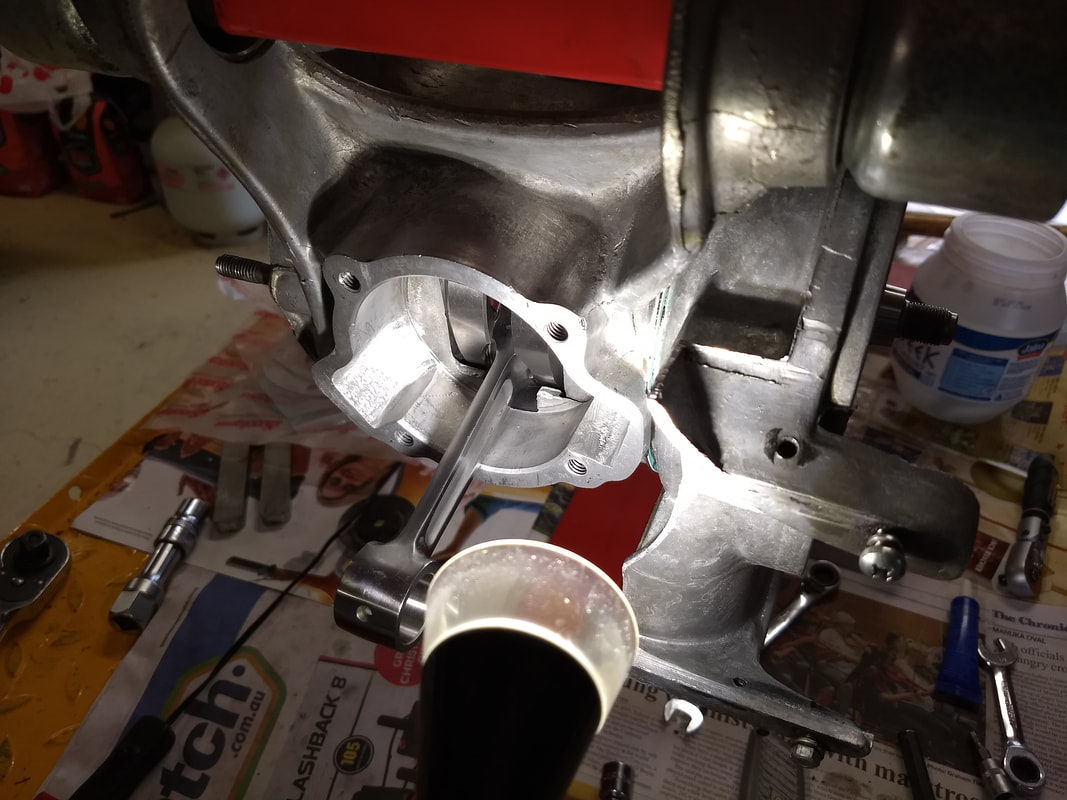
Next fit the hub cone, not forgetting the shim and making sure the gap sits over a spline.
Picture
Picture
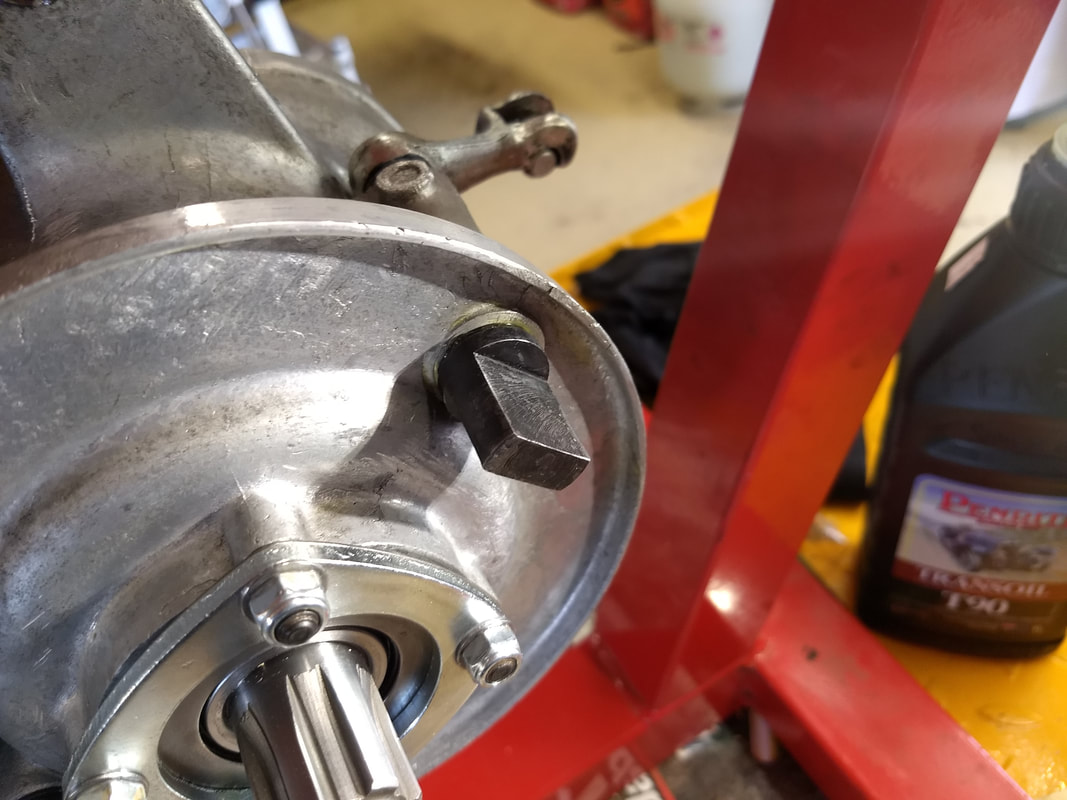
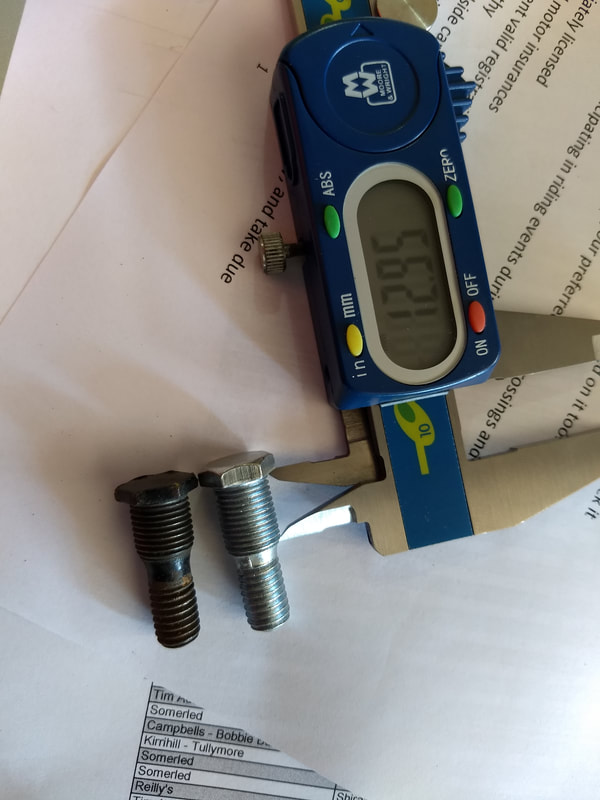
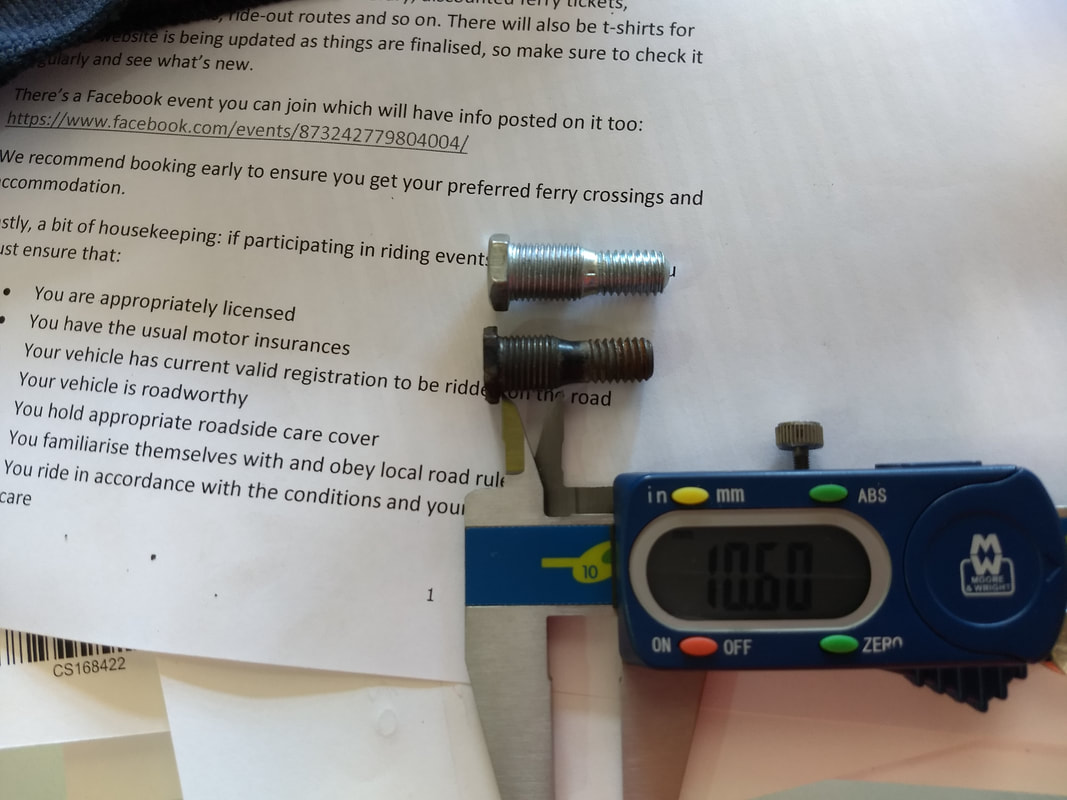
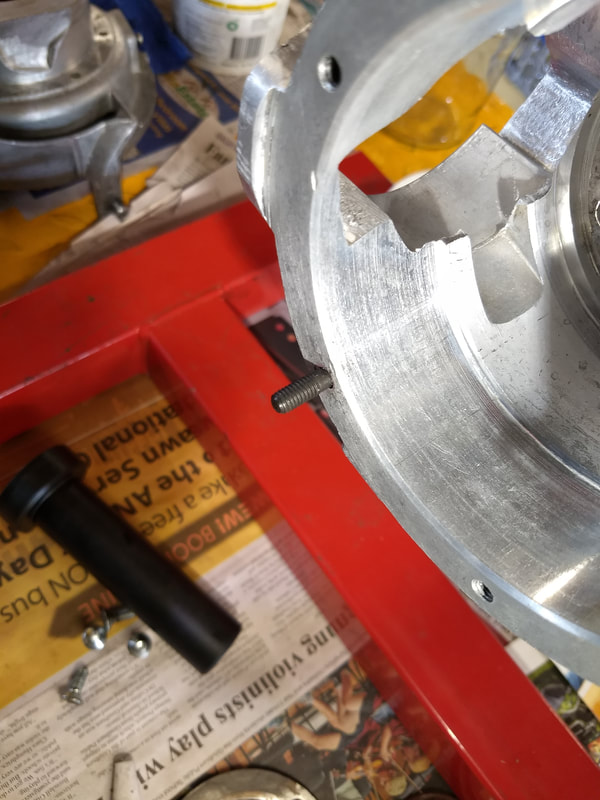
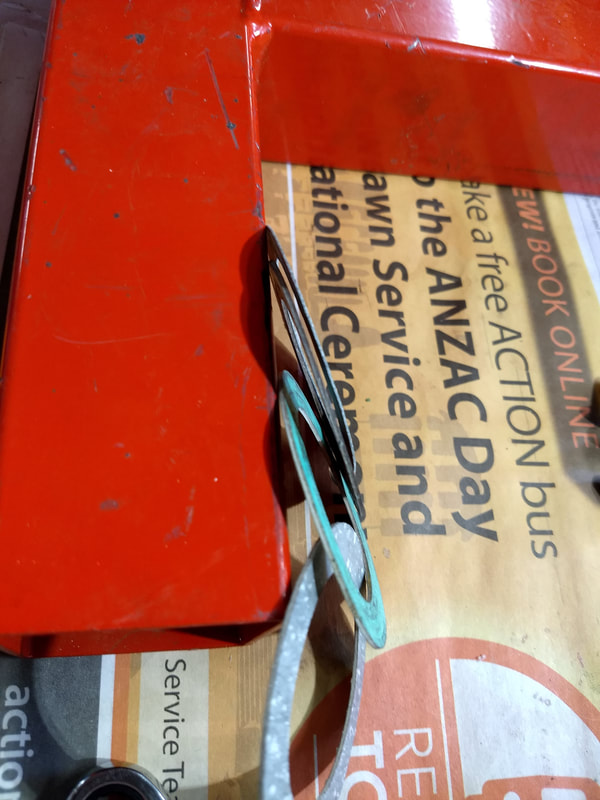
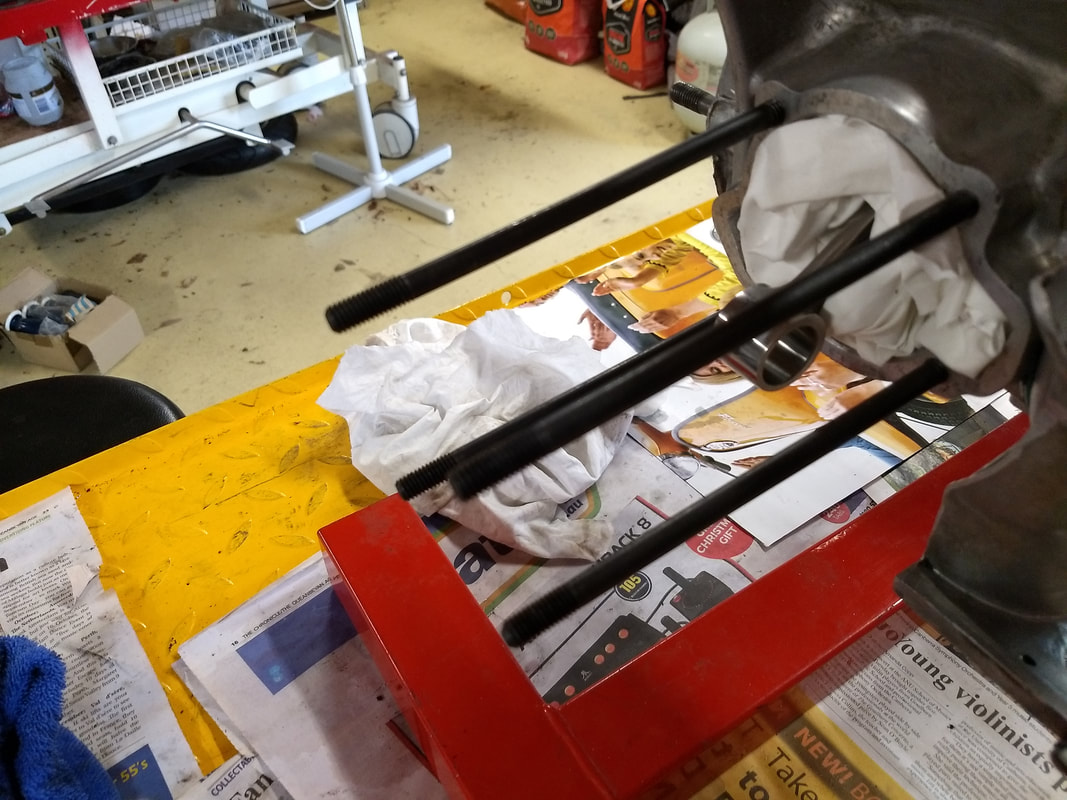
I've bought a Casa Octopus Hub (the standard spline version). This came supplied with extra long studs, for use with an Octopus wheel rim (naturally), but I'm using the AF tubeless rim that came with the GP when supplied by Rayspeed. The Casa studs are too long. Shouldn't be a problem as you can just use four standard studs, in theory. 
Picture
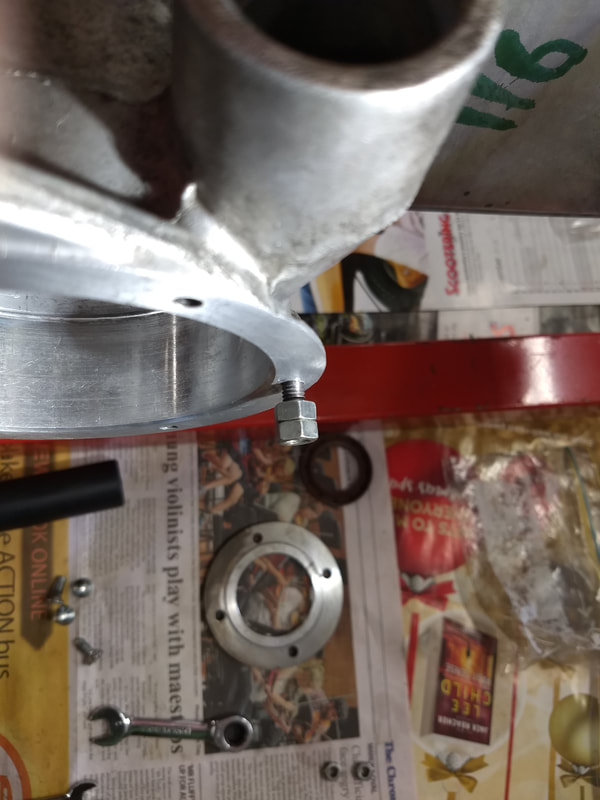
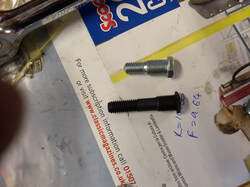
Casa extra long stud v. new standard length

Picture
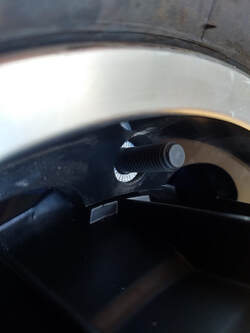
Casa stud is too long

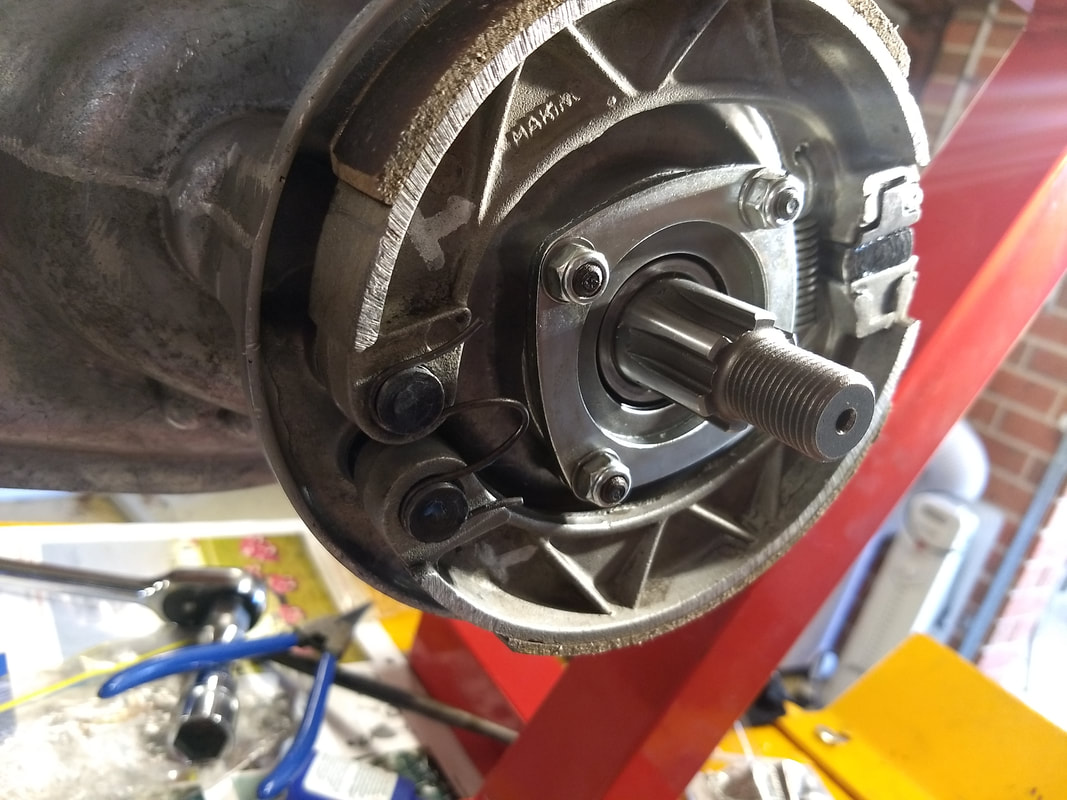
The standard studs I have protrude too far though the hub though, and prevent the rim from sitting flat on the hub! Looking in a box of bits that Nicky picked up from the web I find an original stud, and you can see that the thread on my new one is at least 2mm too long. Ah the joys of maintaining machinery using basically cottage industry parts...
Picture
Picture
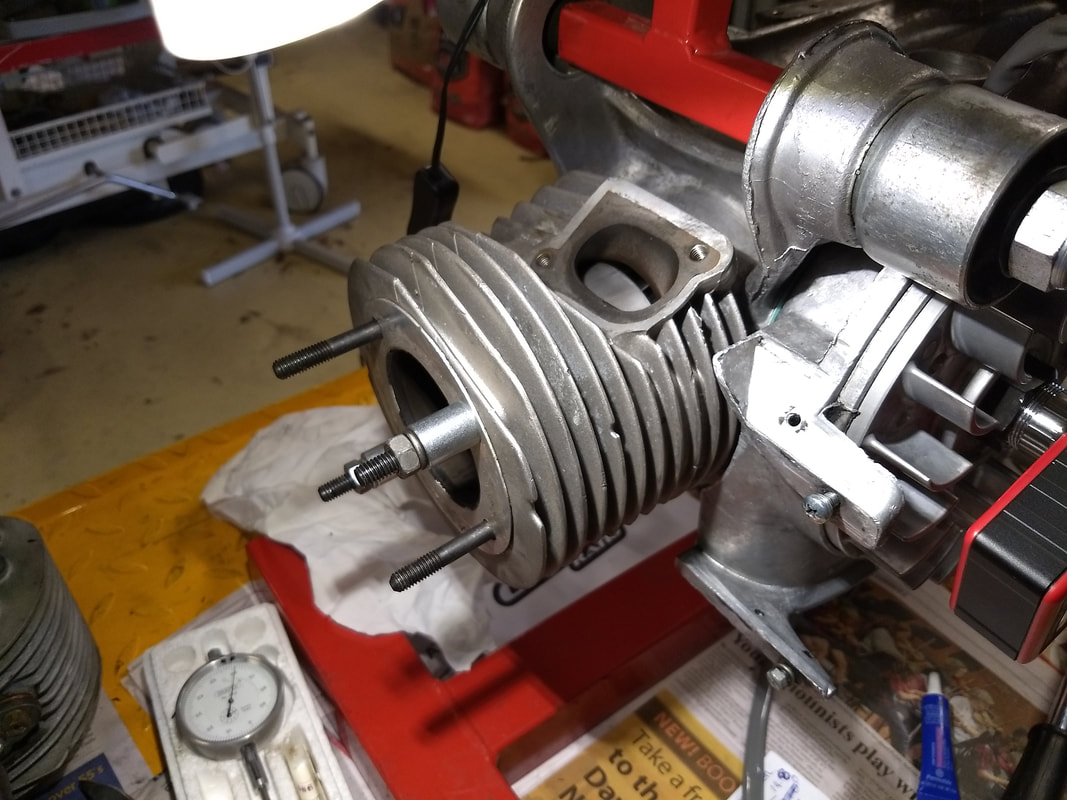
Well a frustrating bitsa kind of a day, but I do end up with a list of parts to order from Steve. Inspecting the TS1 shows I also need new exhaust and inlet gaskets. I now have to face the fact that this engine will not be built and set-up prior to the all-inclusive rally in March. Time to put it aside and service my Jet instead. If you're going see you there. It should be a great weekend.
<Next> <Previous>
0 Comments

Indian GP Engine Build Part 8

20/2/2020

0 Comments

 
Buzzwanglelisatering!

The woodruff key has arrived from Steve Diffey, so I now have two. Luxury. Time to switch focus to the other side of the crank.
Picture
I'd picked up a BGM stator and flywheel at a discounted price from Scooter Center, so intended to use these (anyone noticing a pattern in my sourcing (hoarding) of cheaper parts for use in projects?). I did wonder if the 2kg flywheel weight might be too heavy, being obsessed with lightened flywheels like most old scooter boys...It came up in a phone conversation with Steve Diffey and he couldn't see a problem, preferring to use a mid-weight one for touring use, which allow a lower tick-over and provide a slower drop-off in power when hitting a hill or headwind. Looking at the flywheel chart in Sticky's manual, 2kg is significantly heavier than the 1.35kg AF ones I'm used to using, but sits right in the middle of the flywheels available on today's market. She'll be right. On thing missing, possibly due to the bargain price, are fitting instructions. Well I've got detailed ones for using the stator with non-BGM flywheels...
Picture
Picture
The instructions are abvailable on the Scooter Center website, so I download them from there. Turns it you just bolt it on, strobe it and move if required. I don't have the proper BGM flywheel holding tool but a 32mm spanner does the job. It'll be a bit big to carry in a toolkit though, so one goes on the shopping list.
I do like the bigger GP exit arrangements for the stator wiring. Saves all that fiddling trying to get multiple spade connectors though a hole that's the same size as a spade connector...not that I've got any connectors on the wires yet.
Picture
Picture
Okay, time to get completely side-tracked by a new toy. I bought myself a Buzzwangle! The club also now has them available for members in most regional toolkits. I've got a couple of 200 barrels lying around for future projects, a Mugello and an AF Rapido (road version I think). I intend to use one for my next engine build and so am curious to compare port timings. First up the Mugello.
Picture
Picture
With the barrel and piston on I use a dial gauge to set the top dead centre mark. The BGM flywheel has lovely clear scribe marks for TDC and various BTDC settings. Very nice, and using these it's easy to see that my existing mark sits nicely in the centre of the TDC dwell, the gauge moving just as the scribe line reaches its outer edges on either side.
Picture
Picture
Picture
Checking port timings with the Buzzwangle is very straightforward, requiring only a thin bent feeler. I just bent an old one which I'll leave in the Buzzwangle box. There's no point me trying to explain because Sticky has provided a simple, easy to follow YouTube clip in his manual (https://www.youtube.com/watch?v=hWRTeAvhBG0). This covers the exhaust port. Just use exactly the same technique to measure the other ones.
Picture
Picture
The Mugello has the following timings:
  • Inlet - 152 degrees
  • Transfer - 112 degrees
  • Exhaust - 173 degrees
  • Blowdown - 30 (this is the difference between the exhaust opening and the transfers)
I'm not claiming any expertise, but these timings are all over the place. A standard Lambretta large block has a transfer timing of 120-124 degrees, so 112 is stuffed. At 152 the inlet is a little above what MB considers a touring tune (I know it's just one man's opinion, but it's a well written guide for an amateur like me) and at 173 the same is true for the exhaust.
Now having said that, looking down the barrel it's clear that the piston is significantly blocking the transfers at bottom dead centre. Simply fitting a packing plate under the barrel will solve this and probably bring the timing up to a usable 120 or so, especially as the kit has wide transfers and a boost port. However, that may stuff up the cylinder head squish clearance...
Picture
Picture
Mugello transfer and boost port (above the inlet)
Picture
Rapido transfer
So the Mugello is down but not out. It's just not a simple bolt-on, but are any kits truly? I should also point out that this is a very early Mugello and I understand that port timings have been significantly revised for later versions. I'll give it another go when building the next engine, whose casings may be totally different from these Indian ones...MB considers a blowdown of 30 to give a peaky difficult to set-up engine, which is certainly what I found when using the kit before.
Now to play with the Rapido.
Picture
The Rapido has the following timings:
  • Inlet - 144 degrees
  • Transfer - 128 degrees
  • Exhaust - 182 degrees
  • Blowdown - 27.5
This inlet timing is nicely in the middle of MB's recommended touring range of 140-150. Transfers at 128 is at the top end of MB's magic range of 122-128. Should work fine. The exhaust at 182 is big and the blowdown at 27.5 is on the large size. Both of which could apparently mean a loss of power on hills, etc. Taffspeed favoured large exhaust timings and MB talks about Terry always losing out on hills when riding his tunes against MB on one of his, but Terry was a large bloke! Hmm. Also this kit felt nicely torquey running a 22mil carb and BGM big-box. I'll be looking to run a 30mil and clubman type exhaust, so it might well work. Problem is it needs a rebore and new piston. Should I go to this expense?
Well, that was totally inconclusive! What is great though is that using the Buzzwangle an amateur like me can get some insight in to why a kit hasn't worked. Now it might well be a case of a little knowledge being a dangerous thing (stop sniggering down the back), but I've found it an interesting waste of time. I highly recommend a Buzzwangle! A whole new world of fettling awaits.
<Next> <Previous>
0 Comments

Indian GP Engine Build Part 7

20/2/2020

0 Comments

 
A fuck up

With the crank in I now fit the front socket. I'm going for an 18-47 sprocket combination with my 34 tooth fifth gear (the taller option). This gives a final drive ratio of 4.67, which is very close to the 4.6 ratio recommended in the AF Gear Chart for the TS1/JL3 exhaust combination that I'm building. Fourth gear is the same as the previous Indian GP 200 box at 5.22, which will be fine for sitting in slower group rides when fifth may be too tall. Also, conveniently, 18-47 are the sprockets I have...
Picture
Sprocket spring caps are notorious for being difficult to fit. The recommended technique is to tap the cap with a mallet before tightening. This brings the splines in line and is accompanied by a change in sound to the tap. This has always worked for me and all looked good this time, however when tightening I noticed that the cap had gone wonky. One side was going down the splines fine but the other side wasn't!
I backed off, tried again...checked it, filed off some burring, tried again...all to no avail. At this point I gave up and walked away. I needed to place an order with MB for one of their flange type inlet manifolds anyway, so added one of their special tapered sprocket caps to the same order. This should be easier to fit and I wasn't happy using the now damaged original one...
Picture
Picture
<Next> <Previous>
0 Comments

Indian GP Engine Build - Part 6

13/2/2020

0 Comments

 
More Bottom End

A couple of years ago there was a worldwide shortage of decent Lambretta crankshafts, so when a discounted Jasil racing one came up on the SIP website I grabbed it. Funnily enough SIP launched their own range of Lambretta crankshafts not long after 🙄. Anyway, I'd picked up an known and reputable racing crank for a good price; certainly one that was more than up to the job of handling the power from this engine...

The next job is to fit the flywheel side bearing inner race on to said crank. I'm pathologically opposed to "tapping" things on to cranks, and have previously fitted inner-races by freezing the crank and heating the race in the oven. According to Sticky's manual, overheating the race could change the properties of the metal. I heated it in an oven set on 180, which is about 30 degrees less than I've seen on my CHT, so I'm guessing it's okay...
Picture
Picture
Picture
The heated race dropped straight onto the frozen crank. One thing to watch if you do this is that condensation will build up on the crank as it comes back to room temperature, so leave it in a warm dry place, like Canberra in February, until it's completely dry.

Tash and Steve got us tickets for Gladys Knight in Sydney, so we spent a drunken couple of nights at their place in Sydney, during which I picked up a new set of end-plate studs and nuts. I can now complete the final build for the gearbox. With a full set of good studs properly torqued I found that my previous shimming was irrelevant, and ended up with a 1.4 shim and 5 thou of clearance. Smallest allowable shim, largest allowable clearance! The gearbox would move but was very tight with a 1.5 shim, so after 1000k I'll check everything again.

I'm still not happy with the clearance for the gear selector bracket in first. The Scootopia bracket that I've got lying around is much slimmer than the SIL one I'd fitted, however, it needs a washer under it. MB sell precision shims explicitly for this, or I could just use one from my Fyshwick Fastenings multipack that does the job with no free play...the Scootopia bracket now fits perfectly with plenty of clearance.
Picture
Yes, I did change all the rear hub oilseal plate nuts to Nyloc!
Picture
Picture
I can finally get the bottom-end together. First up, replace the dodgy looking Indian mag-housing studs with new ones from Mr Diffey.
Picture
Picture
My Indian engine came fitted with a good quality steel drive-side oilseal plate (rather than the aliminium ones used by SIL), and inspecting it showed no sign of warping and a nice even fit, so a new Viton oilseal is fitted to this. Viton seals are quite stiff so I found it easiest to use a vice with rubber jaws to press it in to place (forgot to take a picture, oops).
Picture
Picture
I've previously found some main bearing "haltite" gaskets too thick to allow the oilseal plate to sit properly flat, and sure enough the four different ones I have are all of different thicknesses.
Anyway, I pick the best one and fit the plate using allen-headed screws torqued to 3.8 foot-pounds and the weakest possible threadlock, as recommended by Sticky. This is a huge improvement on the old flat-head screws and centre-punching from yesteryear (although part of me still wanted to centre-punch the screws, to be sure, to be sure)
Picture
Picture
Next I lube up the seal and crank with 2-stroke, and gently ease it in using the correct tool (as the actress said to the bishop). I'm really careful to slowly bring the crank in to the seal because, as said before, Viton seals are stiff and you can easily flip out the internal spring. Sticky recommends heating them with a heat-gun or hairdryer to make them more flexible, so I'd used my work-lamp to do a Heath Robinson approximation of the same before beginning...it all went well, so I'm calling that "another way".
Picture
Picture
Picture
Picture
Next up, fit the mag-housing. The manual says some use just grease with the gasket and some recommend silicon seal. Having previously had an annoying and intermittent air-leak through a mag-housing I'm firmly in the silicon seal camp. I'll take extra work when rebuilding over a holed piston every time! Once fitted the crank is checked for clearance on both sides and it's perfect. I'm really chuffed with how this is going.
Picture
Note, the mag-housing packed with HTB grease to the correct level, I hope. I'm never totally sure how much to put in, but it looks like the picture in Sticky's book. I'm thinking half the sales of CasaCooler mag-housings are from people like me who aren't sure how much grease to use...the bearing is petrol-oil lubricated? - take my money!
Picture
More new studs: The ones fitted to my engine looked good, but again it just seems like a good idea to change them. There's rolled ones and Indian ones and Vespa ones, and ones that are too thick/too thin. I'm not going to pretend to understand all the nuances, but have fitted quality ones that won't stretch when torqued, or cause the barrel to expand weirdly, or result in strange wobbles in the space-time continuum, er, anyway, the ones recommended and supplied by Steve, Dr Lambretta. Before fitting the threads were checked and they are perfect.
Picture
Picture
Okay, let's fit the flywheel, ready for some Buzzwanglelisatering. Um, shiny expensive new crank meet shiny expensive new flywheel, except there's this little $3 woodruff key thing needed and guess what I forgot to buy. "I don't bloody believe it!".

That's it for now. Steve has posted me a woodruff key. I also remembered that a Vespa clutch one is identical and called in at Motorini to get one from Nico on the way to last night's Swarm meeting, so shortly I'll have a surfeit of woodruff keys...
<Next> <Previous>
0 Comments
<<Previous

    Pacemaker

    The LCoA online Blog. Write-ups, reviews and general bulldust

    Archives

    December 2024
    November 2024
    September 2024
    July 2024
    June 2024
    May 2024
    April 2024
    April 2023
    January 2023
    July 2021
    January 2021
    July 2020
    April 2020
    March 2020
    February 2020
    January 2020
    November 2019
    August 2019
    June 2019
    September 2018
    July 2018
    June 2018
    February 2018
    December 2017
    June 2017
    May 2017
    July 2016
    April 2016
    March 2016
    January 2016
    December 2015

    Categories

    All

    RSS Feed

© The Lambretta Club of Australia 2015 - 2025 Incorporated in the State of Victoria under the Associations Incorporation Reform Regulations 2012 . Reg No: A0051726A