This is the first part of an occasional series where I actually get my finger out and rebuild an Indian GP engine, taking the opportunity to use some of the club tools and plug bits from various super dealers.
As some of you will know I bought an Indian restored GP from AF Rayspeed six years ago. The "restoration" was basically a complete new build around the original 1977 frame, using all new Indian parts. Anyway, after 8000 mostly trouble free, and it has to be said often full-bore long distance kilometres, I pulled the engine apart in the knowledge that this was considered the usual "life" of an Indian built engine. Sure enough the crank, gearbox and various other bits and bobs were consigned to the bin!
The plan is to rebuild around a second-hand TS1 top-end and brand spanky new 5-speed AF gearbox, which was supplied by Paul Cain, the Australian AF Importer. Most other bits and bobs have been sourced from Steve Diffey of Lambretta Obsessions. Guidance gratefully provided by Sticky's Green Manual, which he and Stuart Lanning supplied to the club at a considerable discount, as those members lucky enough to get one will know.
So where to begin? Well I thought about following the manual page=by-page, but as I'd listed and bought new bits while I pulled the engine apart, all of which are now in various boxes around the garage with me only half-remembering what I have, I decided to work my way through the boxes and fit bits as they came to hand, in a hopefully fairly logical order (what can possibly go wrong?)
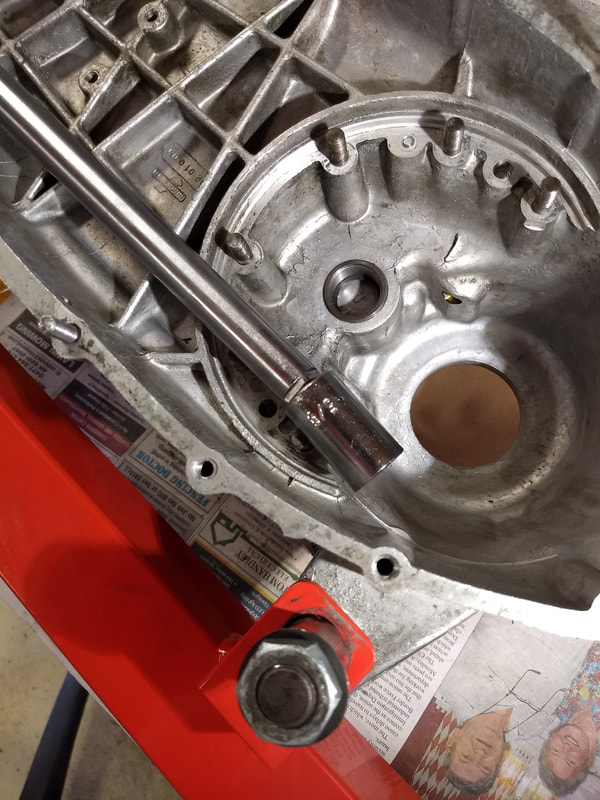
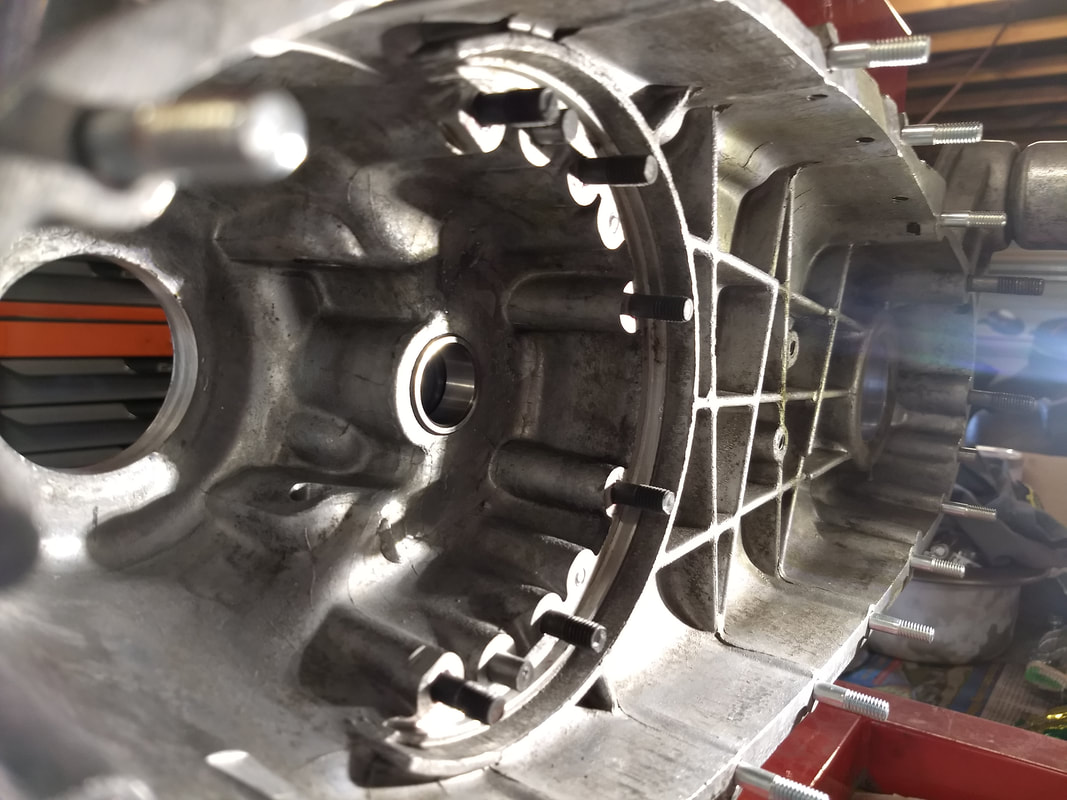
Step One - Replace the Gear Cluster Bearing Track.
Sticky talks about the Indians fitting the track proud (p116), and sure enough this was a problem with mine. Hence the cluster was pitted, overheated and generally buggered from a lack of lubrication, which did let me justify forking out for a bargain AF 5-speed box! Much better value than other 5-speed boxes and supplied with the new improved whatsit and all shims, shams and doodaas by a very professional Paul Cain.
Anyway, Sticky's manual makes removing the old track sound a bit daunting, but it turned out to be a doddle, using an old 5/8ths socket that had the required 22mm diameter, heat, grease and hydraulic pressure (heat, pack with grease and whack socket in to the middle of the bearing). With a single repack the track popped out like magic!
As some of you will know I bought an Indian restored GP from AF Rayspeed six years ago. The "restoration" was basically a complete new build around the original 1977 frame, using all new Indian parts. Anyway, after 8000 mostly trouble free, and it has to be said often full-bore long distance kilometres, I pulled the engine apart in the knowledge that this was considered the usual "life" of an Indian built engine. Sure enough the crank, gearbox and various other bits and bobs were consigned to the bin!
The plan is to rebuild around a second-hand TS1 top-end and brand spanky new 5-speed AF gearbox, which was supplied by Paul Cain, the Australian AF Importer. Most other bits and bobs have been sourced from Steve Diffey of Lambretta Obsessions. Guidance gratefully provided by Sticky's Green Manual, which he and Stuart Lanning supplied to the club at a considerable discount, as those members lucky enough to get one will know.
So where to begin? Well I thought about following the manual page=by-page, but as I'd listed and bought new bits while I pulled the engine apart, all of which are now in various boxes around the garage with me only half-remembering what I have, I decided to work my way through the boxes and fit bits as they came to hand, in a hopefully fairly logical order (what can possibly go wrong?)
Step One - Replace the Gear Cluster Bearing Track.
Sticky talks about the Indians fitting the track proud (p116), and sure enough this was a problem with mine. Hence the cluster was pitted, overheated and generally buggered from a lack of lubrication, which did let me justify forking out for a bargain AF 5-speed box! Much better value than other 5-speed boxes and supplied with the new improved whatsit and all shims, shams and doodaas by a very professional Paul Cain.
Anyway, Sticky's manual makes removing the old track sound a bit daunting, but it turned out to be a doddle, using an old 5/8ths socket that had the required 22mm diameter, heat, grease and hydraulic pressure (heat, pack with grease and whack socket in to the middle of the bearing). With a single repack the track popped out like magic!
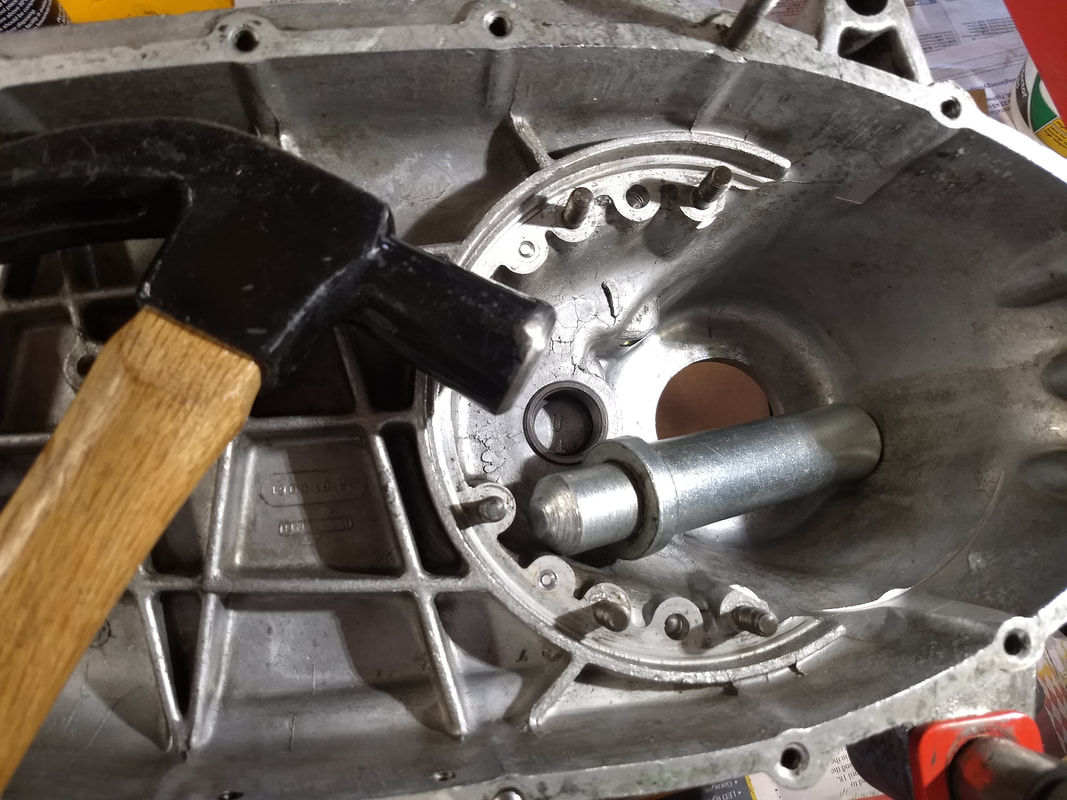
I wasn't happy with my first attempt to fit the new track. It still sat proud. So out it came again and after checking the casings for burring, I popped the track in the freezer for ten while heating the casings. This time a couple of taps with a bearing drift had it nicely in place
What next? Well the casings needed a final clean. Everyone probably has their own ways. I use Kero and old toothbrushes to remove the worst of the crap, then finish off with Supercheap parts cleaner. I also find white spirit is good for removing those last stubborn bits of old gasket. This picture shows the first of the utilised club tools clearly; the engine holding tool, which if my memory serves me right, was supplied by Chris Townsend.

The engine internals parts box throws up a new set of crank-casing studs, the Indian motor being fitted with bolts originally. Now those who fitted these because "that's what the racers did" back in the eighties will know what a recipe they are for stripped threads!
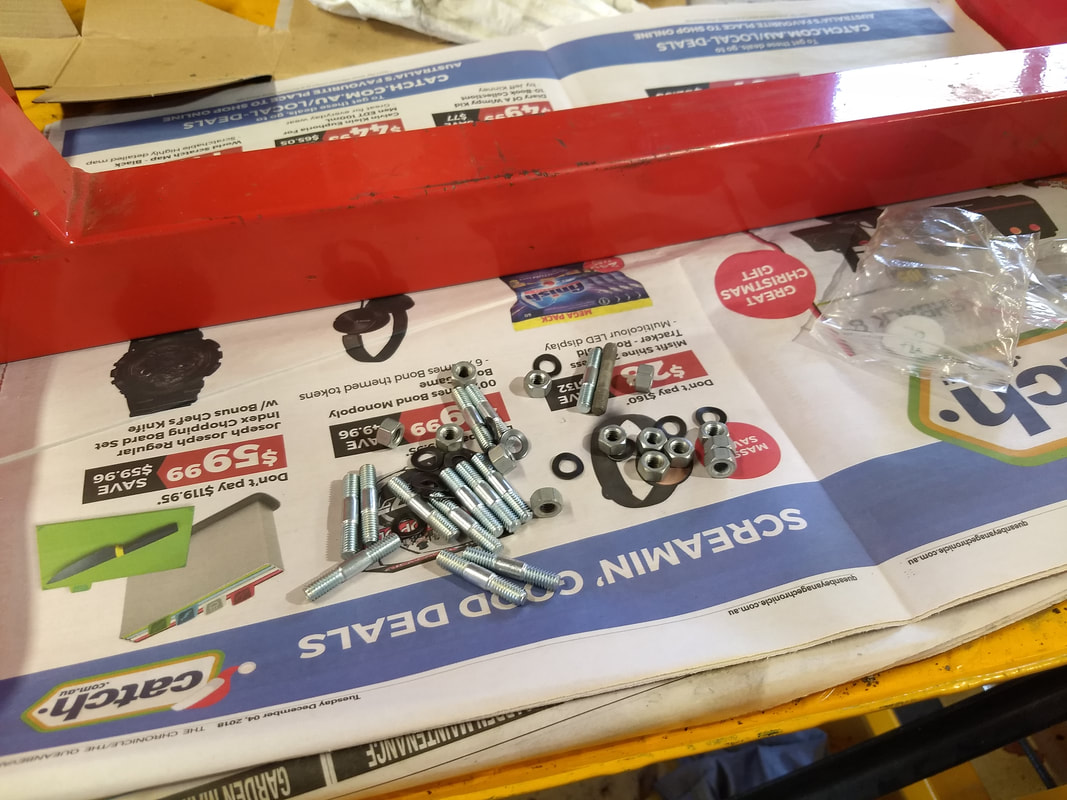
Fitting was a simple job of double-nutting. Sticky suggests using Loctite Stud Lock when fitting, but I've struggled to remove some in the past. I compromised by using a tiny amount of it.
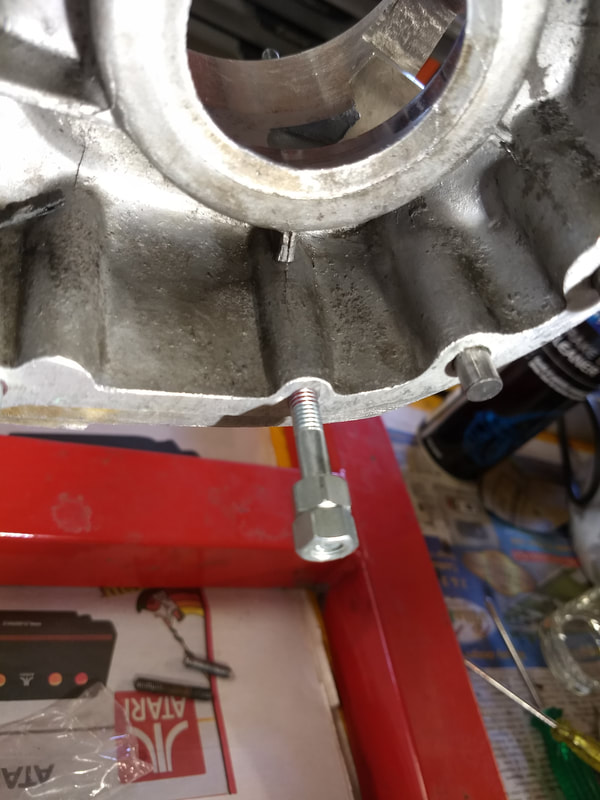
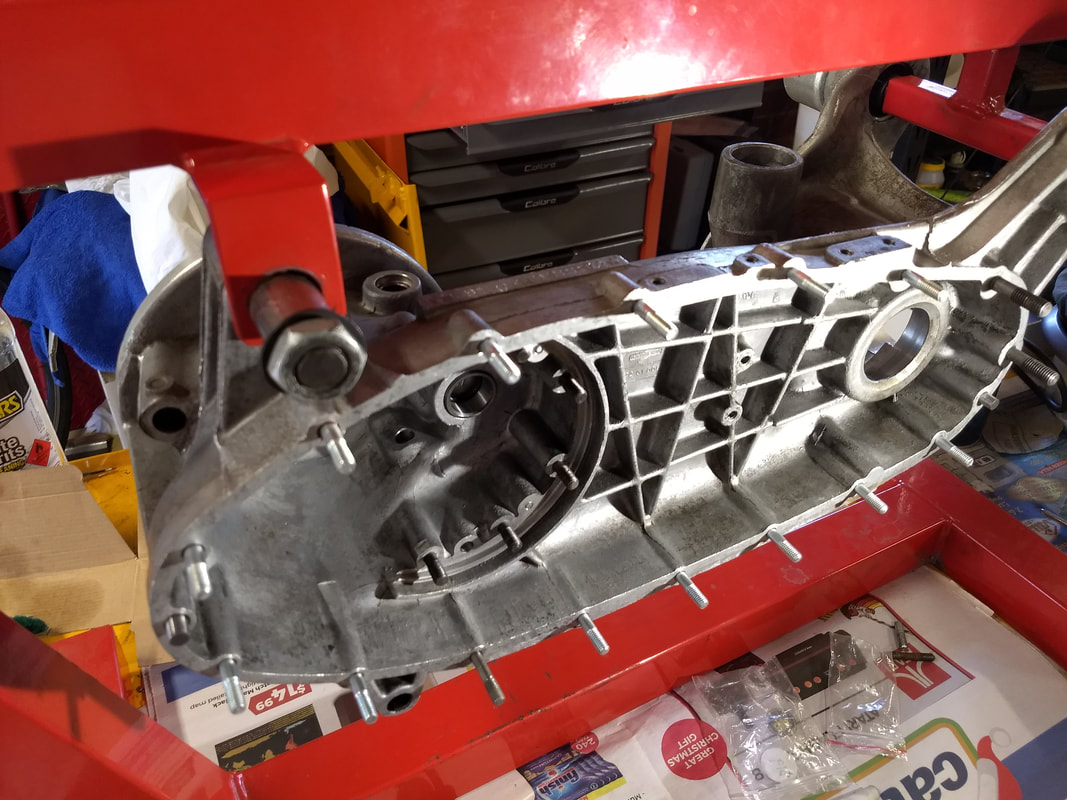
The next things that could be fitted that came to hand were a new set of end-plate studs. I thought the ones I had looked okay, but Sticky said that some dealers recommend always changing them. I had them so why not? Sure enough some of the old ones came out far too easily! I happily fitted the new ones with stud-lock and refitted the dowels using Loctite Bearing Fit, as suggested.
Well that's it for part one. Not the most exciting start! Hopefully it contains some useful tips, and/or, you can let me know if I've stuffed anything up!
Cheers,
Chris.
Cheers,
Chris.
 RSS Feed